使用Gemini Pro API和Google Apps脚本自动创 Google Drive上的文件描述

摘要
Gemini LLM 现在是 Vertex AI/Studio API,通过 Google Apps 脚本轻松解锁文档摘要和图像分析。本文详细说明了一个自动生成 Google Drive 文件描述的示例脚本,并突出了使用 API 密钥的无缝集成选项。
介绍
最近,LLM 模型 Gemini 已经发布,并且现在作为 API 在 Vertex AI 和 Google AI Studio 上可用。本文提供了一个使用 Gemini Pro API 通过 Google Apps 脚本自动创建 Google Drive 文件描述的简单示例。认为能够轻松创建 Google Drive 文件的描述,将有助于用户管理大量文件。
Gemini Pro API 可以通过 API 密钥或访问令牌轻松使用,这使其易于与 Google Apps 脚本集成。这种易用性为 Google Apps 脚本内利用生成式 AI 的各种应用程序打开了令人兴奋的可能性。本文作为此类集成的实际例子,旨在指导您有效使用 Gemini Pro API 的过程。
用法
创建API密钥
请访问https://makersuite.google.com/app/apikey 并创建您的 API 密钥。在那时,请在 API 控制台启用 Generative Language API。此 API 密钥用于此示例脚本。
创建Google Apps脚本项目
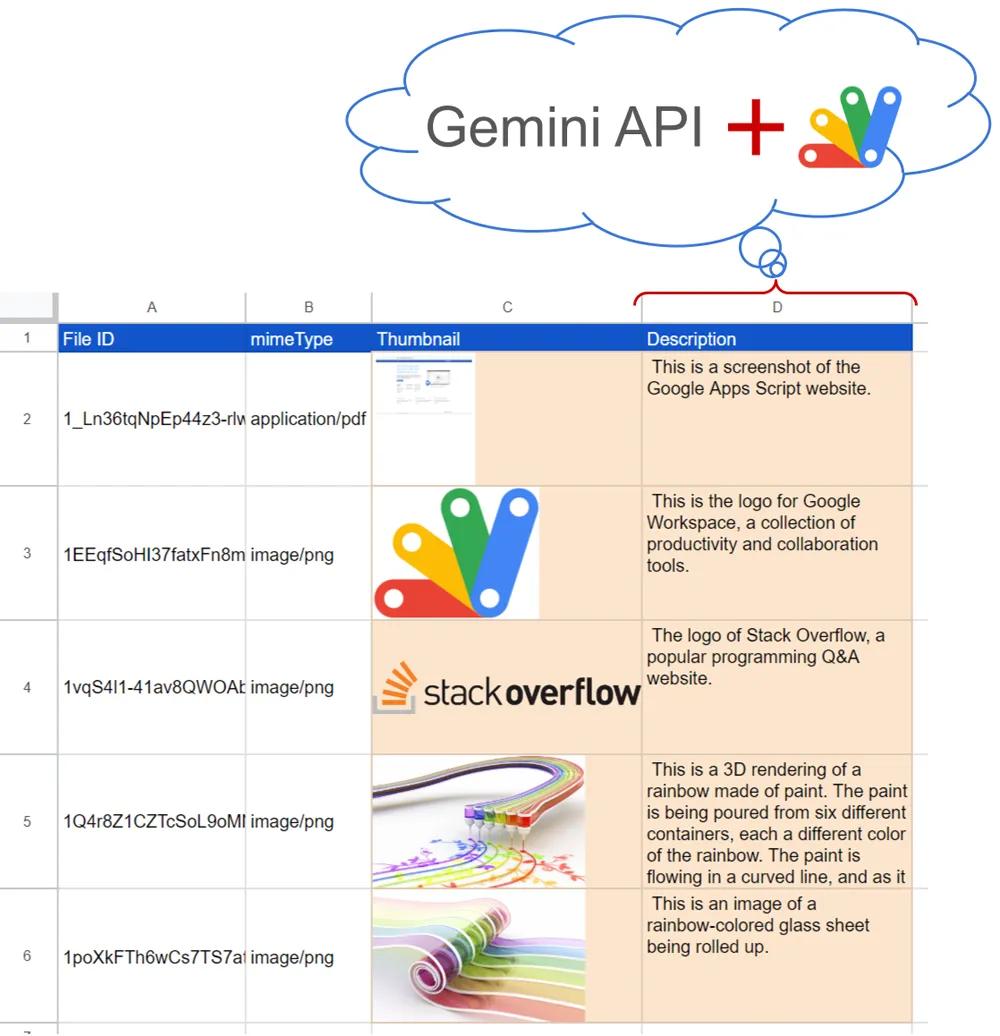
请创建一个 Google 电子表格。并将一些文件 ID 放入单元格“A2:A”。示例情况可以在顶部图像中看到。
这是一个示例脚本。因此,当您设置了大量文件 ID 时,可能无法处理所有文件。
启用 API
请在高级 Google 服务中启用 Drive API v3。在当前阶段,Drive API 可以选择 v2 和 v3。在此示例中,使用的是 Drive API v3。
示例脚本 1
在此示例中,将自动创建 PDF 和图像文件的描述。
在示例情况的顶部图像中,通过转换 https://www.google.com/script/start/ 网站创建了一个示例 PDF。这些示例图像来自此页面。
请将以下脚本复制并粘贴到脚本编辑器中。请设置您的 API 密钥和工作表名称,并保存脚本。在此示例中,我使用了方法:models.generateContent。
为了分析图像数据,将其作为 base64 数据提供给 Gemini API。
此示例脚本使用 v1beta。如果版本更改,请修改端点。另外,请确认新版本的规格。
/**
 * ### Description
 * Generate text from text and image.
 *
 * @param {Object} object Object including API key, text, mimeType, and image data.
 * @return {String} Generated text.
 */
function getResFromImage_(object) {
  const { apiKey, text, mime_type, data } = object;
  const url = `https://generativelanguage.googleapis.com/v1beta/models/gemini-pro-vision:generateContent?key=${apiKey}`;
  const payload = {
    contents: [{ parts: [{ text }, { inline_data: { mime_type, data } }] }],
  };
  const options = {
    payload: JSON.stringify(payload),
    contentType: "application/json",
  };
  const res = UrlFetchApp.fetch(url, options);
  const obj = JSON.parse(res.getContentText());
  if (obj.candidates.length > 0 && obj.candidates[0].content.parts.length > 0) {
    return obj.candidates[0].content.parts[0].text;
  }
  return "No response.";
}

// This function retrieves file IDs from column "A" of Spreadsheet, and put the response values into columns "C" and "D".
function sample1() {
  const apiKey = "###"; // Please set your API key.
  const sheetName = "Sheet1"; // Please set your sheet name.
  const sheet = SpreadsheetApp.getActiveSpreadsheet().getSheetByName(sheetName);
  const range = sheet.getRange("A2:A" + sheet.getLastRow());
  const fileIds = range.getValues();
  const token = ScriptApp.getOAuthToken();
  const values = fileIds.map((id) => {
    const url = `https://drive.google.com/thumbnail?sz=w1000&id=${id}`;
    const bytes = UrlFetchApp.fetch(url, {
      headers: { authorization: "Bearer " + token },
    }).getContent();
    const base64 = Utilities.base64Encode(bytes);
    const description = getResFromImage_({
      apiKey,
      text: "What is this image?",
      mime_type: "image/png",
      data: base64,
    });
    console.log(description);
    if (description == "No response.") return;
    Drive.Files.update({ description }, id);
    const image = SpreadsheetApp.newCellImage()
      .setSourceUrl(`data:image/png;base64,${base64}`)
      .build();
    return [image, description];
  });
  range.offset(0, 2, values.length, values[0].length).setValues(values);
}
// This sample script retrieves the response from a single file.
function sample2() {
  const apiKey = "###"; // Please set your API key.
  const fileId = "###"; // Please set your file ID.
  const url = `https://drive.google.com/thumbnail?sz=w1000&id=${fileId}`;
  const bytes = UrlFetchApp.fetch(url, {
    headers: { authorization: "Bearer " + ScriptApp.getOAuthToken() },
  }).getContent();
  const base64 = Utilities.base64Encode(bytes);
  const description = getResFromImage_({
    apiKey,
    text: "What is this image?",
    mime_type: "image/png",
    data: base64,
  });
  console.log(description);
  if (description == "No response.") return;
  Drive.Files.update({ description }, fileId);
}
测试
- 当你运行函数sample1时,文件ID从电子表格的“A”列中检索出来,并且响应值被放入“C”和“D”列,同时,检索到的描述也设置给了文件。在顶部图片中你可以看到结果情况。
- 当你使用函数sample2时,响应值是从一个单独的文件中检索出来的,而且,检索到的描述也设置给了文件。
- 在这个示例中,使用了文件的缩略图。基本上,所有在谷歌驱动上的文件的缩略图都可以通过文件ID来检索。所以,当使用这个方法时,所有文件的描述都可以被检索出来。当你想要简单地总结谷歌驱动上的文件时,这个方法可能会很有用。
- 但是,例如,如果使用包含多页的PDF数据,只有第一页被用作缩略图。如果你想要使用所有页面,提供PDF数据中的所有文本可能会更合适。
示例脚本2
在这个示例中,谷歌文档的描述是自动创建的。在谷歌文档的情况下,文档的文本可以简单地被使用。
请复制并粘贴以下脚本到脚本编辑器。并且,请设置您的API密钥和您的谷歌文档ID,并保存脚本。在这个示例中,我使用了方法:models.generateContent。
这个示例脚本使用v1beta。如果版本更改,请修改端点。同时,请确认新版本的规格。
/**
 * ### Description
 * Generate text from text.
 *
 * @param {Object} object Object including API key and text.
 * @return {String} Generated text.
 */
function getResFromText_(object) {
  const { apiKey, q, text } = object;
  const url = `https://generativelanguage.googleapis.com/v1beta/models/gemini-pro:generateContent?key=${apiKey}`;
  const payload = { contents: [{ parts: [{ text: q }, { text }] }] };
  const options = {
    payload: JSON.stringify(payload),
    contentType: "application/json",
  };
  const res = UrlFetchApp.fetch(url, options);
  const obj = JSON.parse(res.getContentText());
  if (obj.candidates.length > 0 && obj.candidates[0].content.parts.length > 0) {
    return obj.candidates[0].content.parts[0].text;
  }
  return "No response.";
}

// Please run this function.
function sample3() {
  const apiKey = "###"; // Please set your API key.
  const documentId = "###"; // Please set your Google Document ID.
  // Retrieve texts from Google Document.
  const text = DocumentApp.openById(documentId).getBody().getText();
  const description = getResFromText_({
    apiKey,
    q: "Summarize the following text within 100 words and output only result.",
    text,
  });
  if (description == "No response.") return;
  Drive.Files.update({ description }, documentId);
}
测试
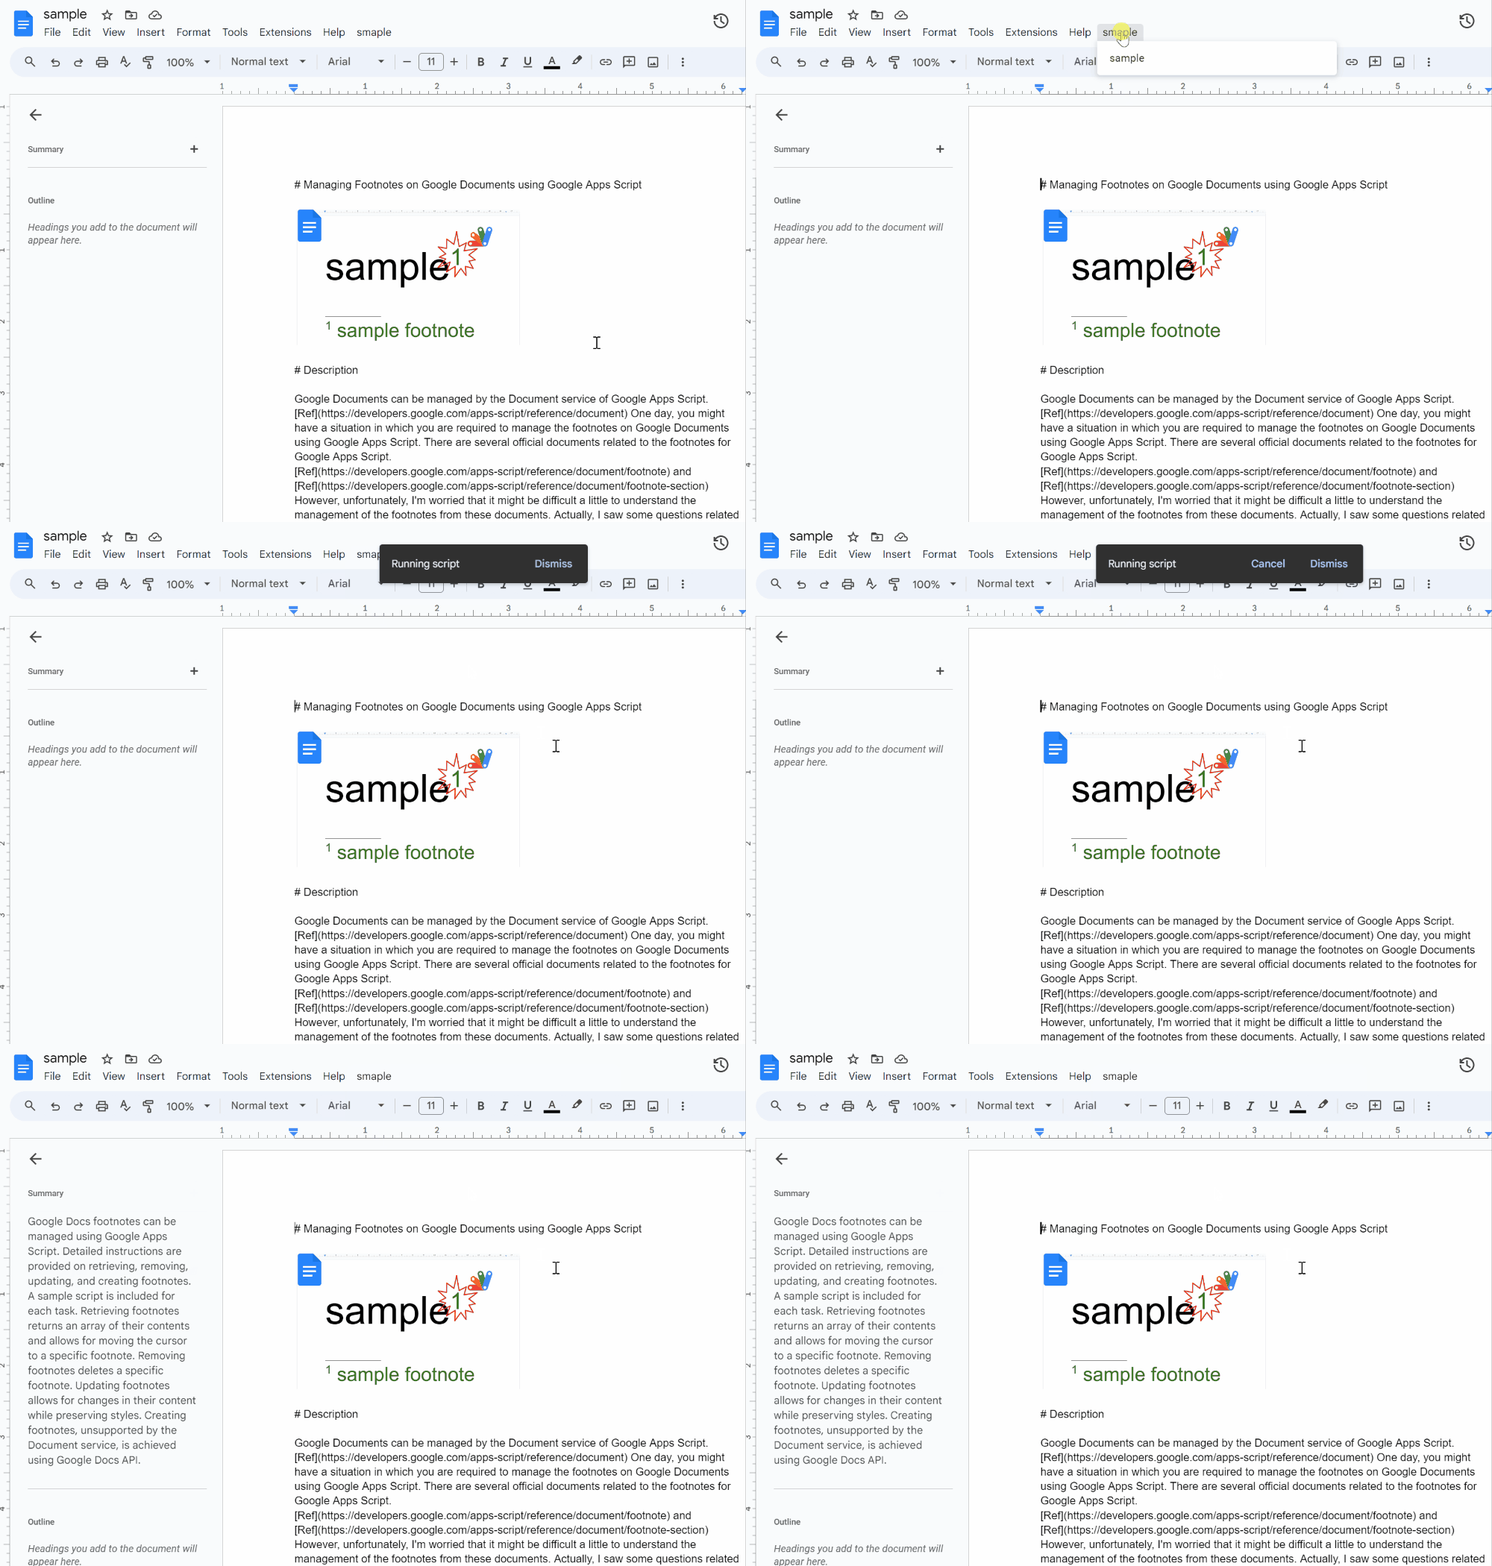
为了测试这一点,我使用了该博客手稿的Google文档。此结果的演示如下。

生成的文本如下。
Google Docs footnotes can be managed using Google Apps Script. Detailed instructions are provided on retrieving, removing, updating, and creating footnotes. A sample script is included for each task. Retrieving footnotes returns an array of their contents and allows for moving the cursor to a specific footnote. Removing footnotes deletes a specific footnote. Updating footnotes allows for changes in their content while preserving styles. Creating footnotes, unsupported by the Document service, is achieved using Google Docs API.
在这个案例中,使用了77个单词。在这种情况下,当你再次运行脚本时,将会以默认设置返回一个不同的结果。当你想要详细地摘要Google文档时,这个方法可能会有用。
在这个示例中,Google文档里的所有文本都被使用了。如果使用第一部分中的sample2脚本,并用这个示例的Google文档ID替换fileId,就会得到以下结果。
This is a screenshot of a Google Document that explains how to manage footnotes in Google Docs using Google Apps Script.


