NiceGUI:Python UI 库指南
NiceGUI是一个基于Python的简单用户界面框架,可与网络浏览器或桌面应用程序流畅运行。无论你是在制作小型网络应用程序、仪表盘,还是在玩机器人项目,NiceGUI 都能以其简单的界面和众多的功能让一切变得简单。
这篇文章的目的是通过列举该库的优缺点,向你展示如何构建和部署 NiceGUI 应用程序。
Streamlit与NiceGUI: 为什么要切换?
虽然Streamlit很适合制作交互式应用程序,但它在处理事件和状态方面可能比较棘手,尤其是对于大型项目。NiceGUI 则不同。它能让你直接控制状态和交互,而不需要额外的步骤或麻烦的变通方法。
简单的状态管理
NiceGUI 使状态管理变得简单。Streamlit 可能会意外重置状态,而 NiceGUI 则不同,无论是起始状态还是用户所做的更改,它都能保持稳定。你可以使用回调功能,以基于事件的方式处理用户交互,而不必为刷新整个页面和丢失状态数据而烦恼。
功能丰富
NiceGUI 有许多很酷的功能:
- 按钮、开关、滑块、输入等交互方式。
- 在屏幕上安排事物的简单方法。
- 用于视觉效果的图表、表格甚至 3D 场景。
- 与 Matplotlib 或 Plotly 等数据可视化库集成。
- 轻松定制颜色和样式
- 帮助编码和测试的工具
- 主要开发人员随时可以回答问题,并非常乐于接受 GitHub 空间上的反馈。
- 构建于流行框架之上: FastAPI、Vue3、Tailwind、Quasar。
局限性
虽然 NiceGUI 非常出色,但值得注意的是,其较小的社区规模可能会带来一些限制。此外,与 Streamlit 等更流行的框架相比,NiceGUI 的学习曲线稍长。最好先熟悉 CSS 和 Tailwind CSS,这样才能充分利用该库的功能。此外,了解 FastAPI、Vue 和 Quasar 可以为你提供更大的灵活性,并扩展你可以实现的功能。
实际操作
现在,让我们探索 NiceGUI 的一些功能,然后构建并部署一个演示应用程序。
基本应用程序
首先安装 NiceGUI:
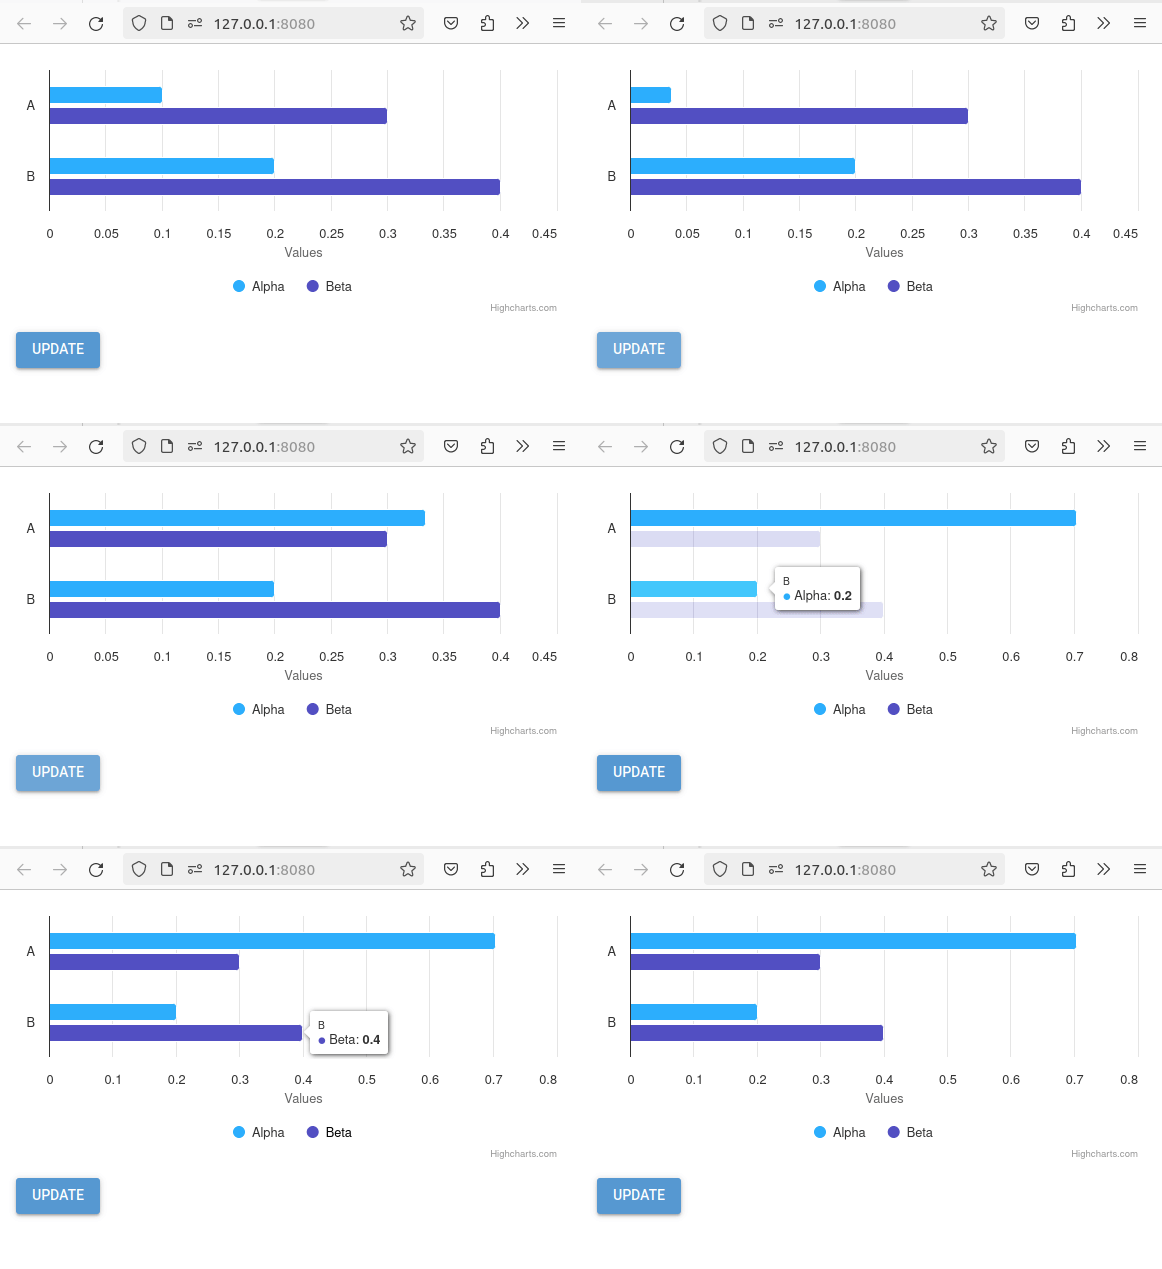
pip install nicegui[highcharts]让我们从主要文档中的一个例子开始:
# https://nicegui.io/documentation/section_data_elements
from nicegui import ui
from random import random
chart = ui.highchart({
    'title': False,
    'chart': {'type': 'bar'},
    'xAxis': {'categories': ['A', 'B']},
    'series': [
        {'name': 'Alpha', 'data': [0.1, 0.2]},
        {'name': 'Beta', 'data': [0.3, 0.4]},
    ],
}).classes('w-full h-64')
def update():
    chart.options['series'][0]['data'][0] = random()
    chart.update()
ui.button('Update', on_click=update)
ui.run()
在这里,用户界面模块将允许你创建一个用户界面元素。
在本示例中,我们首先创建了一个 highchart 元素,并为其分配了 tailwind 类 w-full 和 h-64。

当我们点击按钮时,会触发一个回调函数。该回调函数将更新用于图表的数据,然后以流畅的方式重新渲染。
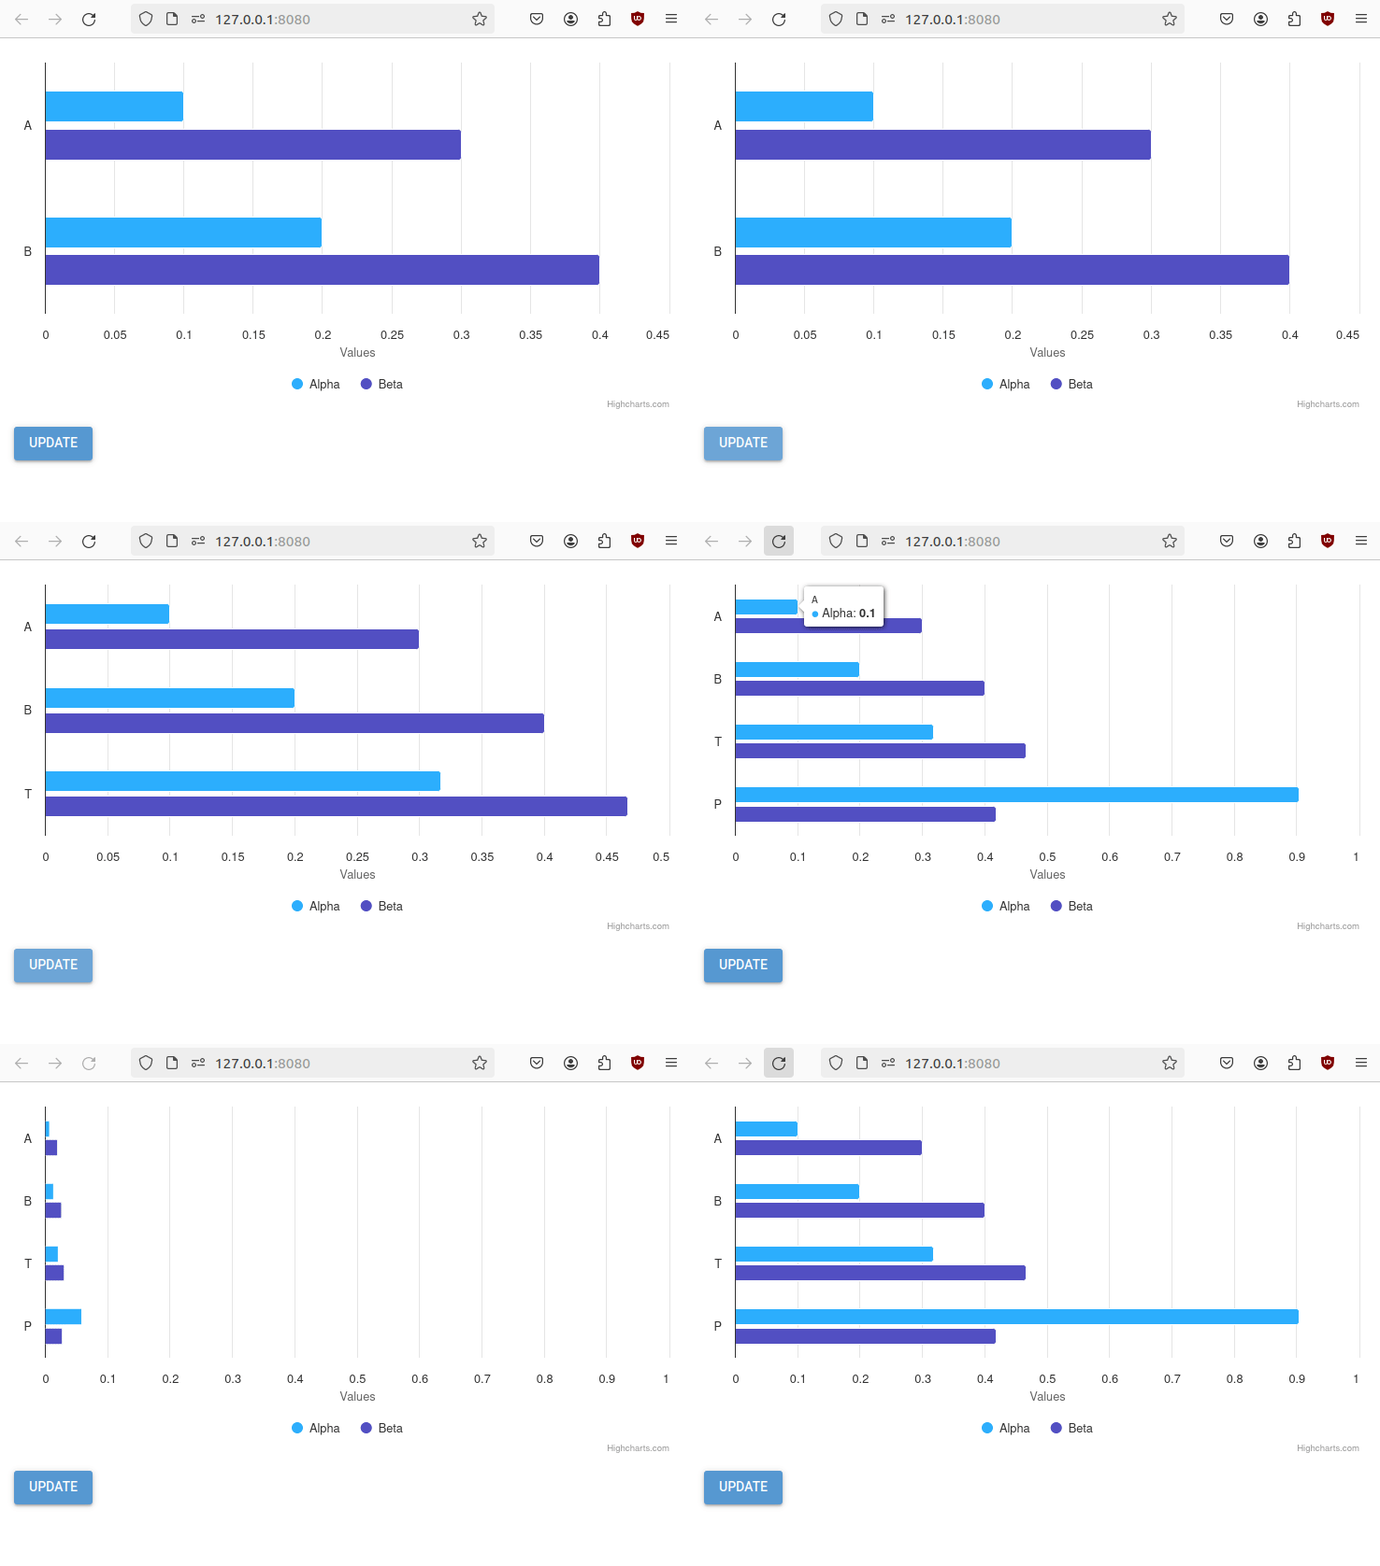
你还可以更改回调函数以添加新的条形图:
def update():
    chart.options["xAxis"]["categories"].append(random.choice(string.ascii_uppercase))
    for series in chart.options['series']:
        series["data"].append(random.random())
    chart.update()

此外,请注意刷新页面不会丢失数据!其他 Python UI 库无法做到这一点。这里之所以会这样,是因为数据是所有用户共享的,但有很多方法可以保持数据针对特定用户,比如 app.storage.user 对象或 app.storage.browser(当包裹在 @ui.page 装饰器中时)。
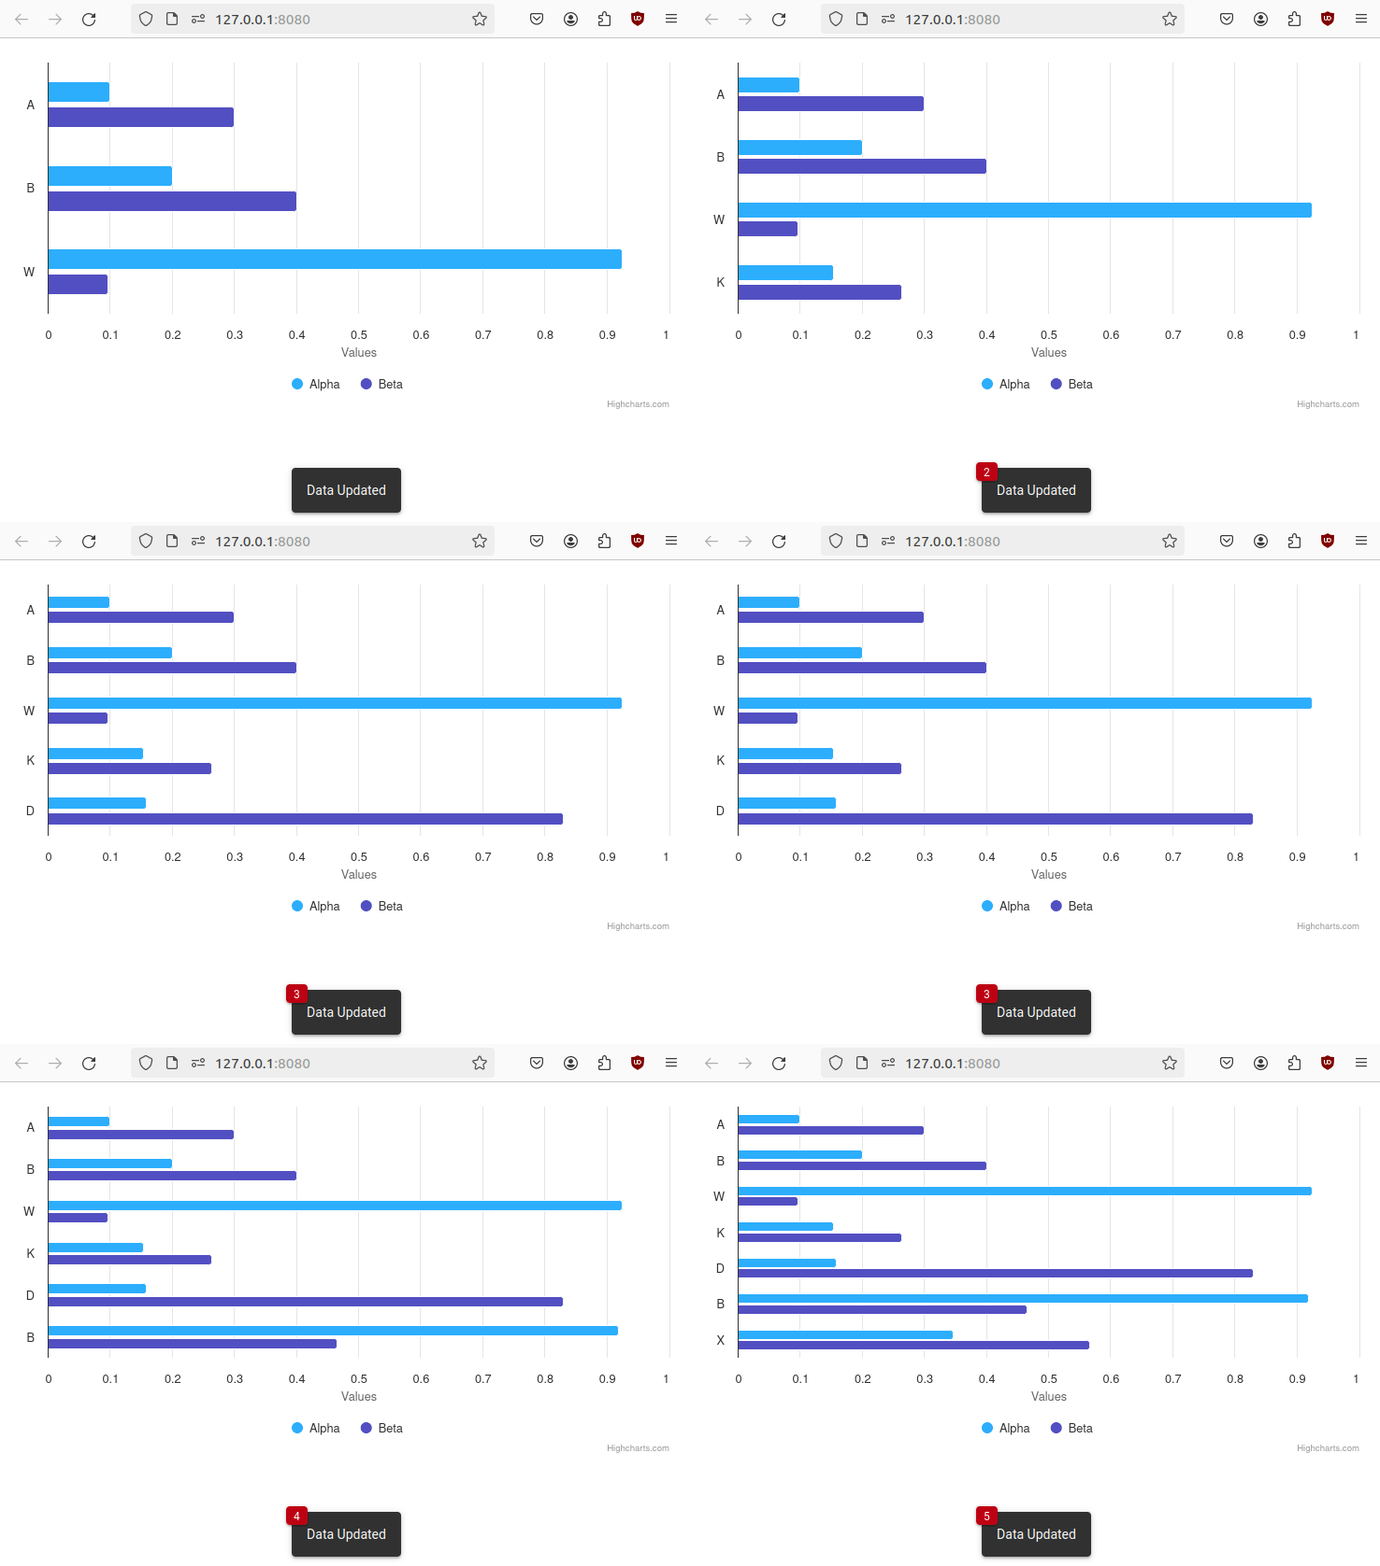
但是,如果你想定期更新用户界面怎么办?只需将按钮元素改为 ui.timer
ui.timer(5, callback=lambda: (update(), ui.notify("Data Updated")))
现在,让我们创建一个演示应用程序,让用户选择一个类别,然后让他们随机生成一个 Chuck Norris 事实。
首先,这里是主代码:
import requests  # Importing the requests library to make HTTP requests
from nicegui import ui  # Importing UI components from the NiceGUI library
from nicegui_app.header import add_head_html  # Importing a function to add HTML head content
# List of categories for Chuck Norris facts
CATEGORIES = [
    "animal",
    "career",
    "celebrity",
    "dev",
    "fashion",
    "food",
    "money",
    "movie",
    "music",
    "science",
    "sport",
    "travel",
]
# Class to handle Chuck Norris facts
class Fact:
    def __init__(self):
        self.fact = None  # Initialize the fact attribute to None
    # Method to update the fact based on a given category
    def update_fact(self, category):
        url = f"https://api.chucknorris.io/jokes/random?category={category}"  # URL to Chuck Norris API
        for i in range(10):  # Try up to 10 times to fetch a valid fact
            result = requests.get(url)  # Make a GET request to the Chuck Norris API
            if result.status_code == 200:  # If the request is successful
                result_json = result.json()  # Parse the JSON response
                if self.fact != result_json["value"]:  # If the fetched fact is different from the current one
                    self.fact = result_json["value"]  # Update the fact attribute
                    break  # Exit the loop
# Function to generate the Chuck Norris fact UI
def chuck():
    add_head_html()  # Add HTML head content for the NiceGUI app
    default_value = CATEGORIES[0]  # Default category for Chuck Norris facts
    fact = Fact()  # Create an instance of the Fact class
    fact.update_fact(default_value)  # Update the fact using the default category
    # Create a grid layout with 12 columns
    with ui.grid(columns=12).classes("w-full"):
        # Column for category selection
        with ui.column().classes("col-span-4 sm:col-span-2 space-x-0"):
            ui.label("Pick a fact category:")  # Display a label for category selection
            # Radio button group for selecting categories
            category = ui.radio(
                CATEGORIES,
                value=default_value,
                on_change=lambda _: fact.update_fact(category.value),  # Update the fact when the category changes
            ).classes("w-full")
            # Button to regenerate the fact for the selected category
            ui.button(
                "⟳ Re-Generate", on_click=lambda _: fact.update_fact(category.value)
            )
        # Column for displaying the Chuck Norris fact
        with ui.column().classes(
            "flex col-span-8 sm:col-span-10 w-full justify-center mx-auto max-w-screen-md"
        ):
            # Label to display the Chuck Norris fact, bound to the fact attribute of the Fact instance
            ui.label().bind_text_from(fact, "fact").classes(
                "text-lg sm:text-3xl text-gray-800 bg-gray-100 rounded-lg shadow-lg p-6"
            )
现在,让我们一步步来:
首先,我们进行必要的导入并定义可能的类别。
然后,定义用于存储和更新随机事实的类:
class Fact:
    def __init__(self):
        self.fact = None  # Initialize the fact attribute to None
    # Method to update the fact based on a given category
    def update_fact(self, category):
        url = f"https://api.chucknorris.io/jokes/random?category={category}"  # URL to Chuck Norris API
        for i in range(10):  # Try up to 10 times to fetch a valid fact
            result = requests.get(url)  # Make a GET request to the Chuck Norris API
            if result.status_code == 200:  # If the request is successful
                result_json = result.json()  # Parse the JSON response
                if self.fact != result_json["value"]:  # If the fetched fact is different from the current one
                    self.fact = result_json["value"]  # Update the fact attribute
                    break  # Exit the loop
该类将事实存储在属性 "fact "中,并有一个方法 update_fact,用于调用 Chuck Norris facts api。
接下来,我们在 "chuck "函数中定义我们的页面。NiceGUI 采用模块化方法,可以通过多个模块和 python 文件定义应用程序。
我们定义数据类的一个实例 fact = Fact() 这是每个用户的特定实例。接下来,我们使用 update_fact 方法初始化事实。
现在,我们开始定义用户界面元素。
我们定义了一个有两列的网格:
- 第一列包含类别选项和生成按钮。这一列有以下尾风类:col-span-4 sm:col-span-2。这意味着在屏幕很小的情况下,它将占用屏幕的 4/12,否则将占用 2/12。这样的设计也适用于手机。
- 第二列,我们将在此显示事实。
第一列
- 一个单选菜单 ui.radio。
- 一个生成随机事实的按钮。
这两个元素在被点击或更改时都将使用一个调用 fact.update_fact 的回调。
第二列
- 我们有一个将其值与 fact.fact 绑定的 ui.label,因此每次该变量发生变化时,都会自动更新显示内容。
标签的 tailwind 类如下:text-lg sm:text-3xl 这样,在小屏幕上文字就会变小。
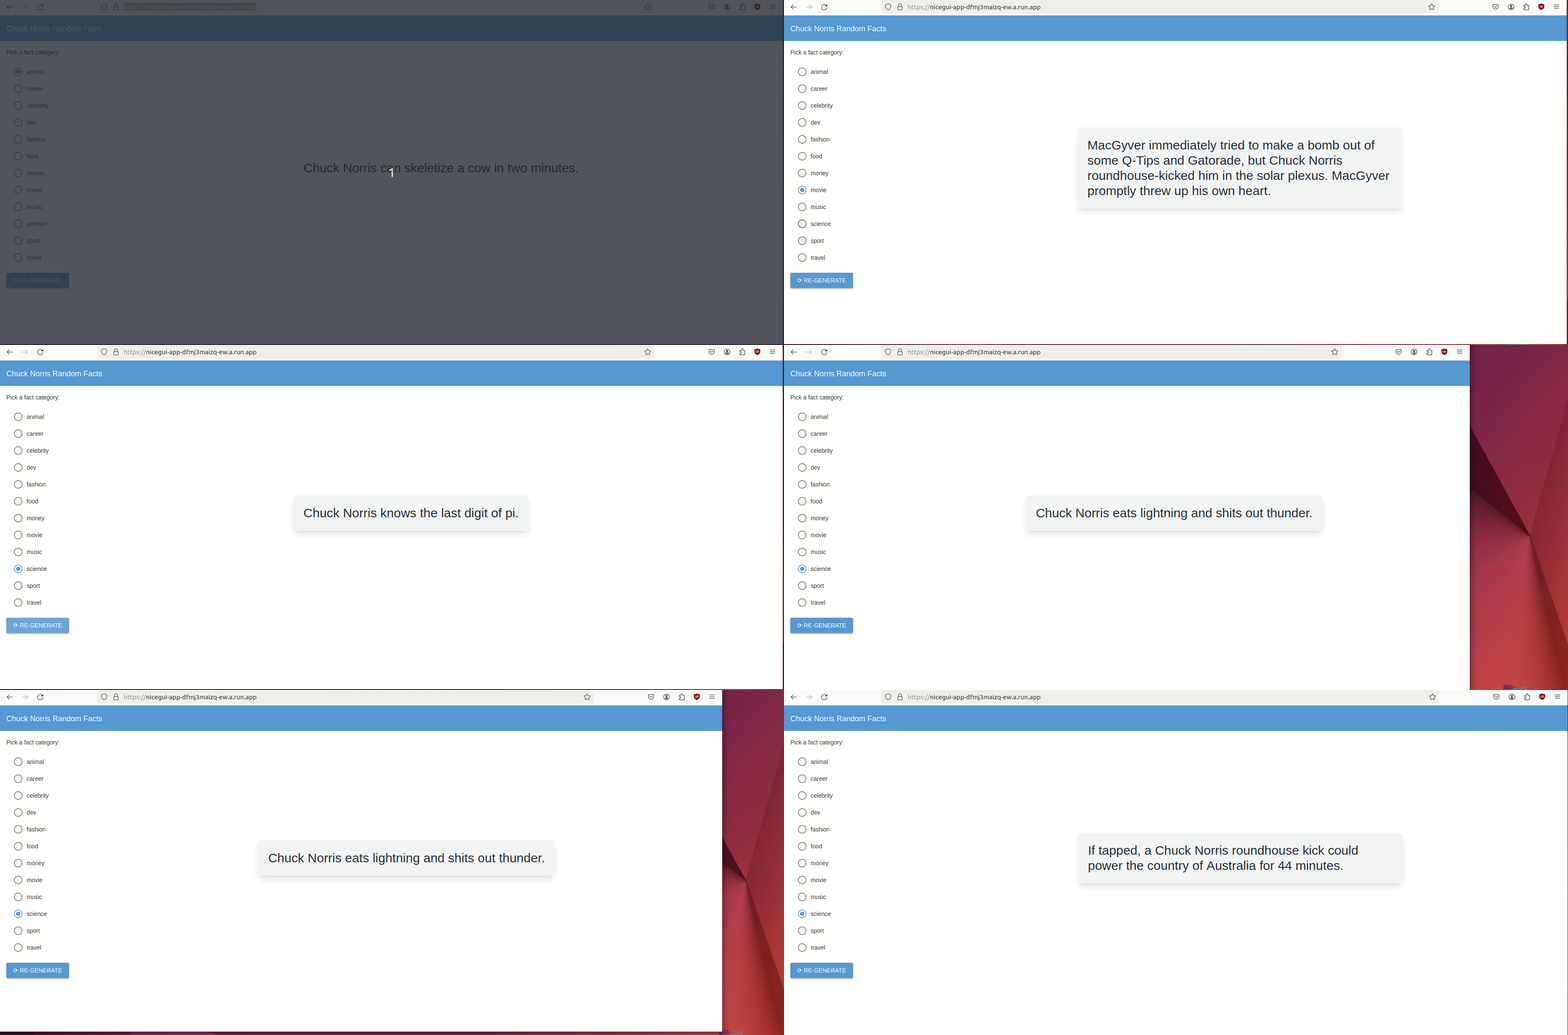
这样就可以得到以下应用程序:

部署
部署此类应用程序非常简单!以 CloudRun 为例。你只需创建一个 Dockerfile,然后运行以下 gcloud 说明即可:
PROJECT_ID=$(gcloud config get-value project)
REPO="demo"
LOCATION="europe-west1"
IMAGE="nicegui_app"
SERVICE_NAME="nicegui-app"
VERSION="0.0.1"
GAR_TAG=$LOCATION-docker.pkg.dev/$PROJECT_ID/$REPO/$IMAGE:$VERSION
# Create repository
gcloud artifacts repositories create $REPO --repository-format=docker \
    --location=$LOCATION --description="Docker repository" \
    --project=$PROJECT_ID  || true # If fails because already exist then its fine
# Build image
gcloud builds submit --tag $GAR_TAG
# Deploy Cloud run
gcloud run deploy $SERVICE_NAME --image=$GAR_TAG --max-instances=1 --min-instances=0 --port=8080 \
 --allow-unauthenticated --region=europe-west1 --memory=0.5Gi --cpu=1 -q --no-cpu-throttling --session-affinity
这将使用云构建(cloud build)构建 docker 镜像,然后将其部署到 CloudRun。
这里唯一的关键选项是:“--no-cpu-throttle--session-affinity”这允许同一用户在可能的情况下路由到同一个容器,并在请求之间保持 CPU 处于活动状态。
总结
如果你想用 Python 快速、轻松地制作用户界面,NiceGUI 是一个不错的选择。它将帮助你构建功能强大的 Python 应用程序,你可以完全控制内部状态,并轻松进行测试和部署。希望它能让你在数据科学项目中表达自己的创造力,而不受工具的限制。


