【完整教程】使用ChatGPT构建数据科学组合网站
本文中展示的提示方法可以在你以后与 ChatGPT 的所有交互中使用。你可以使用这些技术来构建任何具有生成式 AI 模型的最终产品。
1. 使用 ChatGPT 创建东西的提示工程技术
提示工程是创建和优化提示的过程,以便从生成式人工智能模型中获得最佳结果。
在与 ChatGPT 等语言模型对话时,这一点极为重要。
超出模型训练数据范围的含糊不清的提示会导致不理想的结果。
在使用 ChatGPT 构建投资组合网站时,你可以使用以下两种提示技术来获得最佳效果:
顺序提示
使用顺序提示时,不要让 ChatGPT 一次为你创建整个网站,而是逐个创建每个部分。
首先,我们可以让 ChatGPT 创建 "关于 "部分,提示如下:
Please help me create an 'About' section for my data science portfolio website.
The section should start with a large, centered headline that says 'About'.
Below the headline, please include a circular placeholder for the image.
然后,我们可以要求模型在这些代码的基础上创建 "项目 "部分,接着是 "技能 "部分,以此类推。
一次性提示
一次性提示为模型提供了一个你希望输出结果是什么样子的示例。
在这种情况下,你不能简单地告诉 ChatGPT 建立网站的 "关于 "部分,而是要向它展示一个可视化示例,让它知道你希望这个部分是什么样子。
你可以上传草图、模型,甚至是你喜欢的网站的截图,然后让 ChatGPT 为你创建类似的内容。
这比用文字描述你想要的结果要好得多,因为有了可视化的例子,ChatGPT 就能 "看到 "你想要的结构和视觉元素。
ChatGPT 是否曾经误解过你的提示,并给出了与你最初意图完全不同的结果?
在建设一个有很多元素的网站时,这种情况几乎肯定会发生。
上传图片或草图可以消除任何歧义,直接向聊天机器人传达你的要求。
遗憾的是,目前图片上传功能只适用于 ChatGPT Plus。
2. 使用 ChatGPT 构建数据科学作品集网站的提示
我在本文中为 ChatGPT 的免费版和付费版提供了两种不同的提示。
ChatGPT Plus
如果你使用的是 ChatGPT Plus,本文档中将包含一张图片,如下所示:
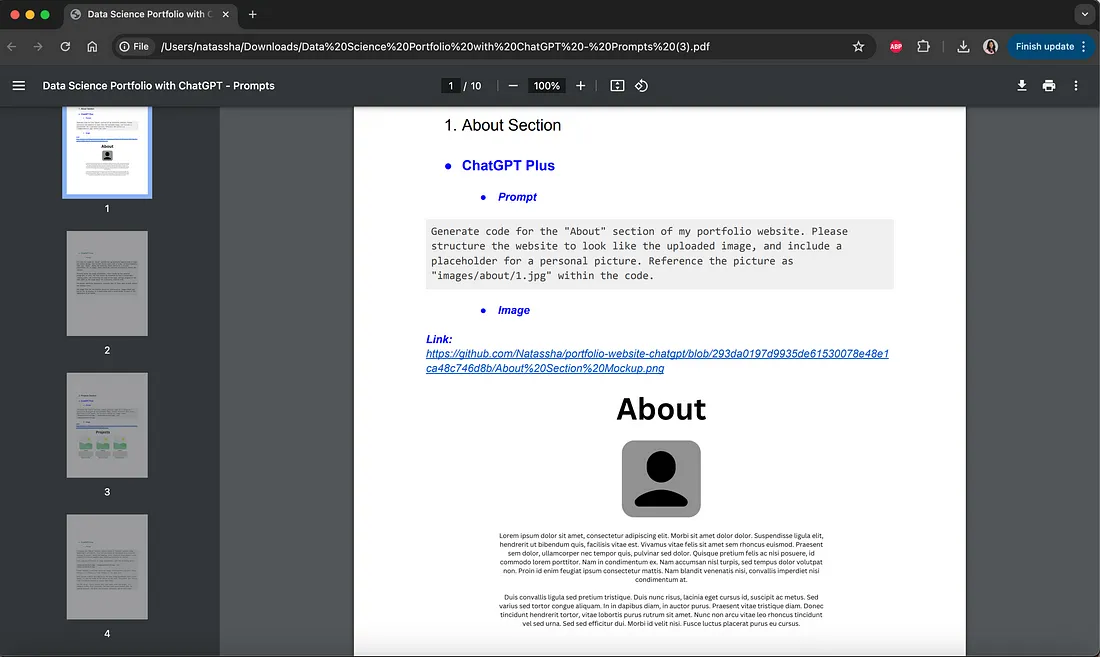
你必须将此图片作为提示的一部分上传到 ChatGPT。你可以复制并粘贴此图片,也可以从提供的链接中下载。
免费版 ChatGPT
免费版没有图片,只需复制并粘贴免费版的提示即可建立网站的各个部分:
ChatGPT Plus
如果你使用的是 ChatGPT Plus,本文档中将包含一张图片,如下所示:
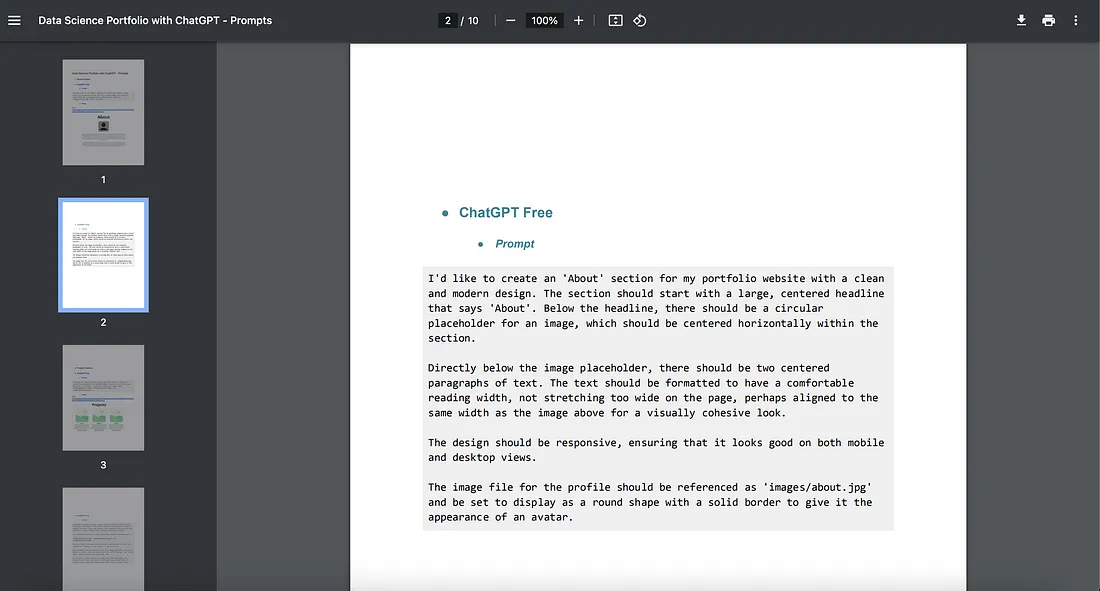
3. 前提条件和环境设置
正如我在本文前面提到的,我们将使用 HTML 和 CSS 代码来构建数据科学作品集网站。
我们将以一种不需要任何编码专业知识的方式来完成这项工作。
因此,即使你不知道如何编写一行 HTML 和 CSS 代码,只需复制和粘贴 ChatGPT 生成的代码,就能创建一个这样的网页。
不过,在我们继续创建投资组合网站之前,最好先熟悉以下概念:
- HTML 和 CSS - 这些语言的作用和运行方法。
- 用于创建网站的编码环境。
- 文件夹组织。
在开始创建网站之前,我会带你了解上述概念,以确保你在复制和粘贴 ChatGPT 生成的代码时知道自己在做什么。
不过,如果你对 HTML 和 CSS 有大致的了解,并知道如何在网页浏览器上运行它们,那么你可以跳过这一部分。
工具和语言
HTML 和 CSS 是构成互联网上所有网站的两种语言。
在本文中,我们将要求 ChatGPT 生成 HTML 和 CSS 代码,并将其复制和粘贴以创建我们的网站。
HTML
HTML 是超文本标记语言(Hypertext Markup Language)的缩写。
HTML 用于构建网站的骨架或结构。
网站的结构--标题、段落和图像都是通过 HTML 创建的。
这就是 HTML 代码的样子:
<html>
<head>
  <title>Title of the document</title>
</head>
<body>
<h1>This is a heading</h1>
<p>This is a paragraph.</p>
</body>
</html>
HTML 代码由标签组成。
标签就像命令。它们告诉网络浏览器如何在页面上显示信息。
例如,在 HTML 中创建一个段落时,会以 <p> 标签开始,以 </p> 标签结束,就像这样:
<p>This is a paragraph.</p>你在网站上添加的每个元素都是如此。
HTML 文档可以用树状结构来表示。树的顶端是 HTML 标签,然后是 head 和 body 标签。
头部包含网站标题以及分辨率等元数据。在 body 中,你可以找到标题、段落和图片等元素。
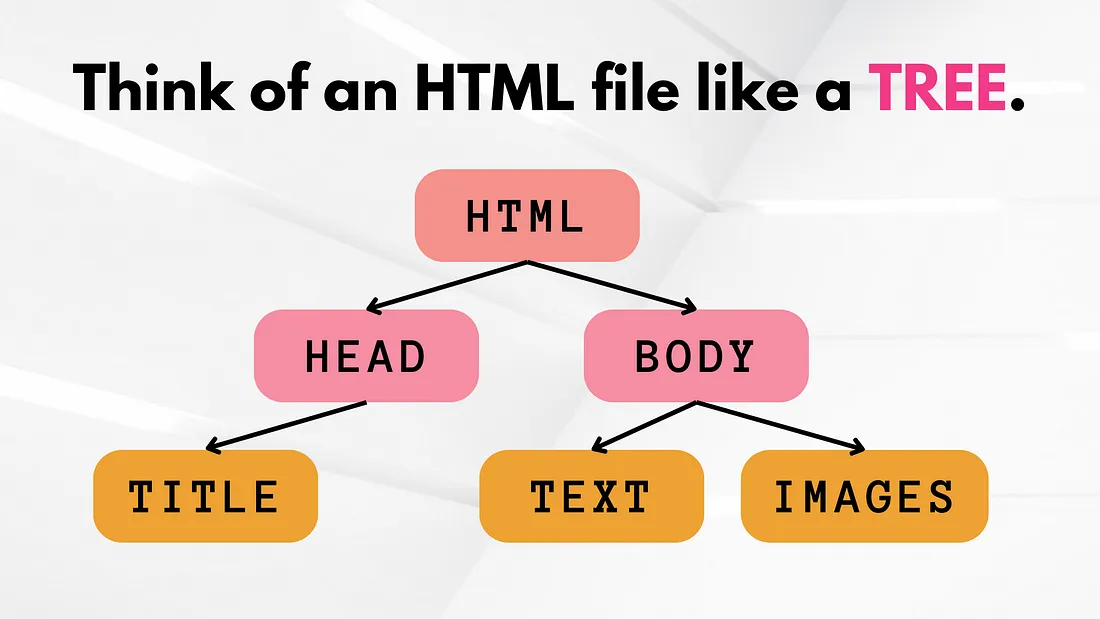
如果你不完全了解 HTML 的工作原理,也不必过于担心,我们只需从 ChatGPT 复制并粘贴这些代码即可。
CSS
CSS 是层叠样式表的缩写。它用于为网站设计颜色、字体和布局样式。
我喜欢把 HTML 想象成房子的框架,把 CSS 想象成家具和油漆。
它能让房子栩栩如生。
在本文中,我们将在 HTML 文档中编写所有 CSS 代码。
我们将使用 <style> 标签来封装所有 CSS 代码。
<!DOCTYPE html>
<html>
<head>
    <title>Simple Page with CSS</title>
    <style>
        body {
            font-family: Arial, sans-serif;
            background-color: #f4f4f9;
            margin: 0;
            padding: 0;
        }
        header {
            background-color: #007bff;
            color: white;
            padding: 10px 20px;
            text-align: center;
        }
        p {
            color: #333;
            padding: 20px;
        }
    </style>
</head>
<body>
    <header>
        <h1>Welcome to My Site</h1>
    </header>
    <p>Hello World</p>
</body>
</html>
在上述代码片段中,<style> 标记后的所有内容都是 CSS 而非 HTML。
我们使用这段代码设置颜色、页边距和字体。
总而言之,在学习本文之前,你应该记住以下两点关于 HTML 和 CSS 的知识:
- HTML 用于创建网站结构。网站的所有内容都放在这里。
- CSS 用于设计网站样式。在本教程中,我们将在 HTML 文档的 <style> 标记中添加所有 CSS 代码。
设置编码环境
既然了解了 HTML 和 CSS 的工作原理,那么如何运行这些代码呢?
答案是:任何文本编辑器。
你可以使用 Notepad++、Sublime Text、Atom、Visual Studio Code 等任何你喜欢的编辑器。
我自己使用的是 Visual Studio Code。
如果你没有文本编辑器,可以按照此链接中概述的步骤安装 Visual Studio Code。
安装文本编辑器后,你需要创建 HTML 文档。
为此,只需打开文本编辑器,转到 "文件",然后创建一个新文件:
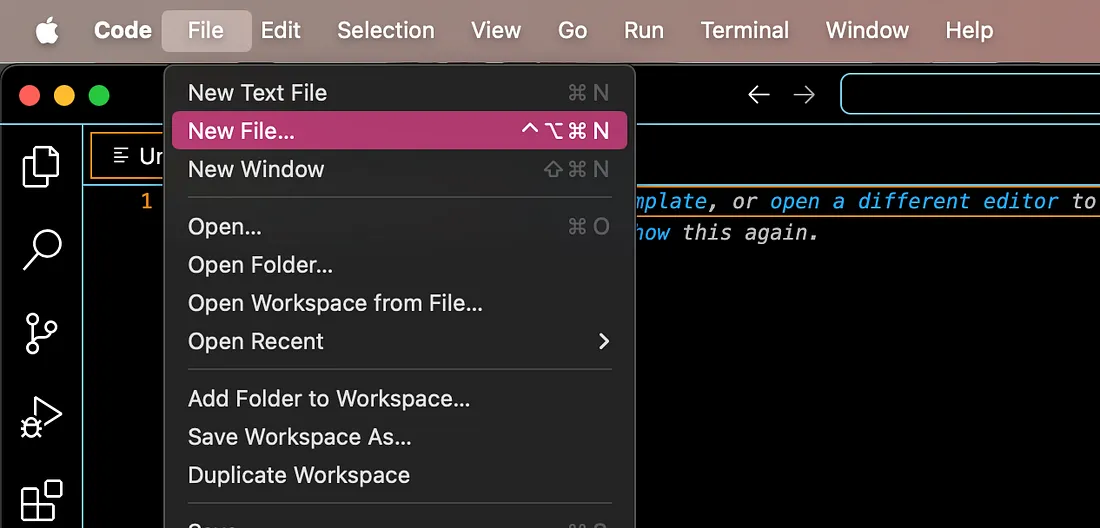
然后,将该文件保存为 "index.html"。确保使用 .html 文件扩展名。这将告诉浏览器这是一个 HTML 文件。
我们将在该文件中编写所有的 HTML 和 CSS 代码,以建立网站。
整理文件夹结构
最后,在我们着手创建网站之前,你需要建立一个文件夹结构。
你必须将所有项目文件整理到一个目录中,以便无缝运行代码。
如果你想自己创建,我建议你这样构建你的项目文件夹:
Data Science Portfolio/
├── icons/
│   ├── github.png
│   ├── linkedin.png
│   ├── medium.png
│   ├── twitter.png
│   └── youtube.png
├── images/
│   ├── about/
│   │   └── 1.jpg
│   ├── projects/
│   │   ├── 1.jpg
│   │   ├── 2.jpg
│   │   └── 3.jpg
│   └── skills/
│       ├── 1.png
│       ├── 2.png
│       ├── 3.png
│       └── 4.png
└── index.html
请在网站的每个部分附上相关图片。例如,在 "关于 "部分,请附上一张你的照片。在 "项目 "部分,请添加约 3-4 张你参与过的项目的图片。
4. 使用 ChatGPT 创建你的数据科学作品集网站
设置自定义说明
要建立作品集网站,我们需要访问 ChatGPT 并设置自定义说明。
这是一项可以让你一次性在 ChatGPT 中输入大量信息的功能。ChatGPT 会保留这些说明,并将其应用到你今后的所有对话中。
自定义说明可以大大提高 ChatGPT 的回复质量和准确性。
要访问自定义说明,只需在屏幕左下角选择你的个人资料。然后,选择 "自定义 ChatGPT",你会看到如下两个字段:
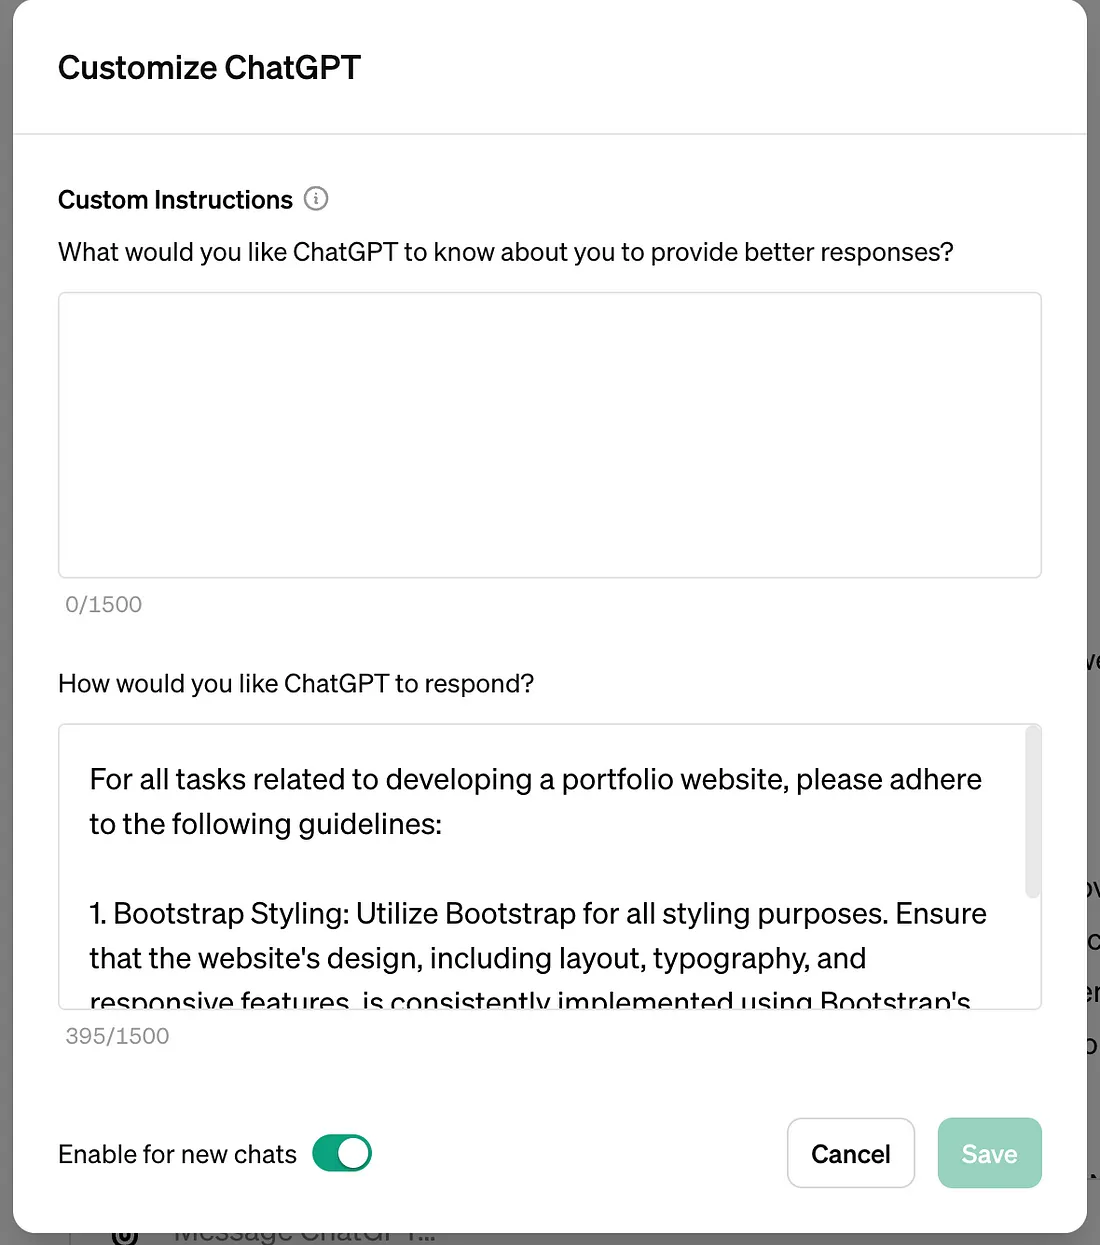
字段 1:个人信息
在第一个字段中,你必须输入你希望 ChatGPT 在今后所有对话中记住的详细信息。
这可以包括你的姓名、职业、爱好和学习领域。
现在我们暂且将其留空。
字段 2:首选回复方式
此字段询问你希望 ChatGPT 在你的所有对话中如何回复。
我们将使用此字段为 ChatGPT 提供一个框架,供其在构建网站时遵循。
这样,每次我们要求模型创建投资组合网站时,它都会遵守这些指令。
下面是我们将输入到该字段中的自定义指令。你可以在本文档中找到它,其中包含本教程的所有提示:
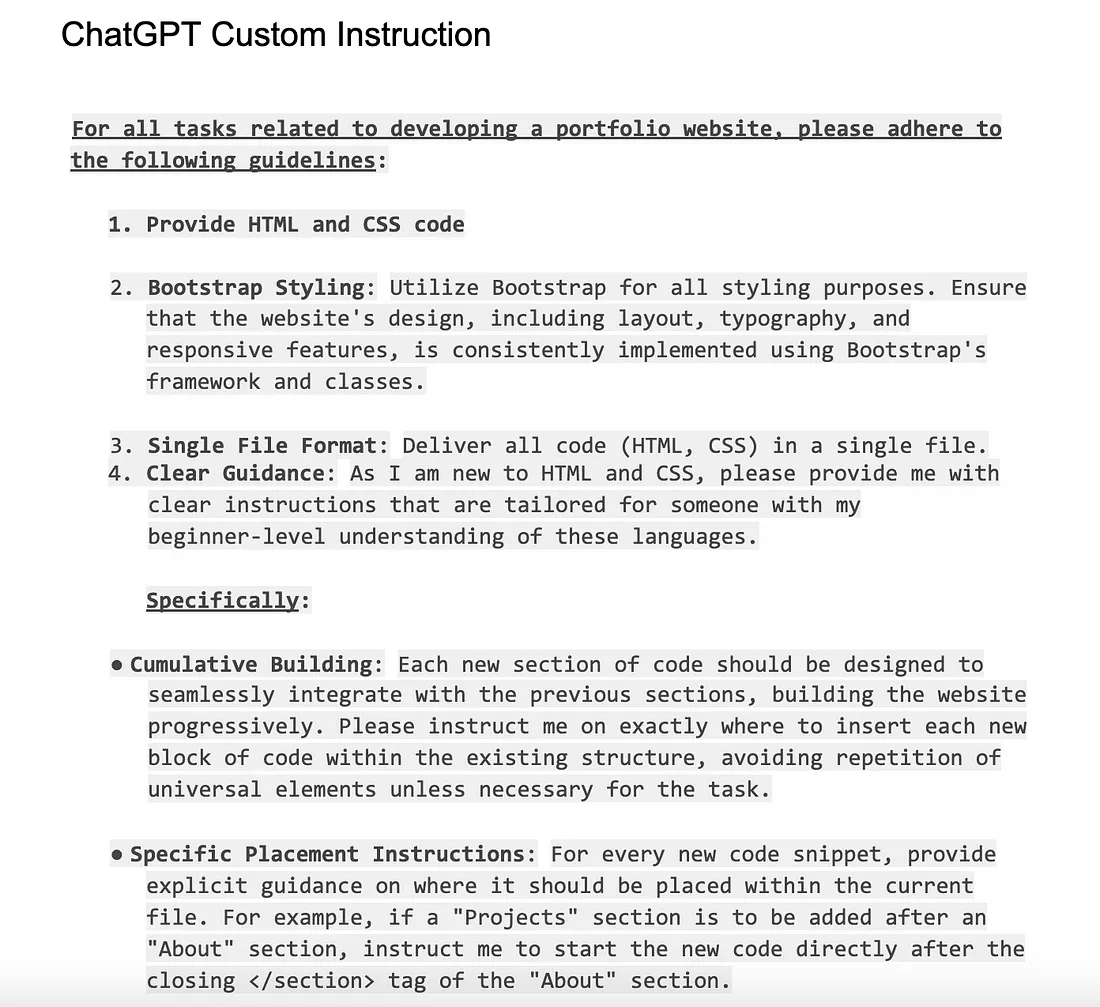
确保将其粘贴到自定义说明对话框的第二个字段--"首选回复样式 "中。
下面是我们输入的自定义说明的简要解释:
提供 HTML 和 CSS 代码
首先,我们要求 ChatGPT 在每次要求它创建网站时都提供 HTML 和 CSS 代码。
Bootstrap 风格
然后,我们要求 ChatGPT 使用一种名为 Bootstrap 的东西来设计网站。
Bootstrap 是一种流行的网页设计框架,用于创建具有视觉吸引力的网站。
举个例子,如果你想创建一个 "项目 "版块,就可以这样做:
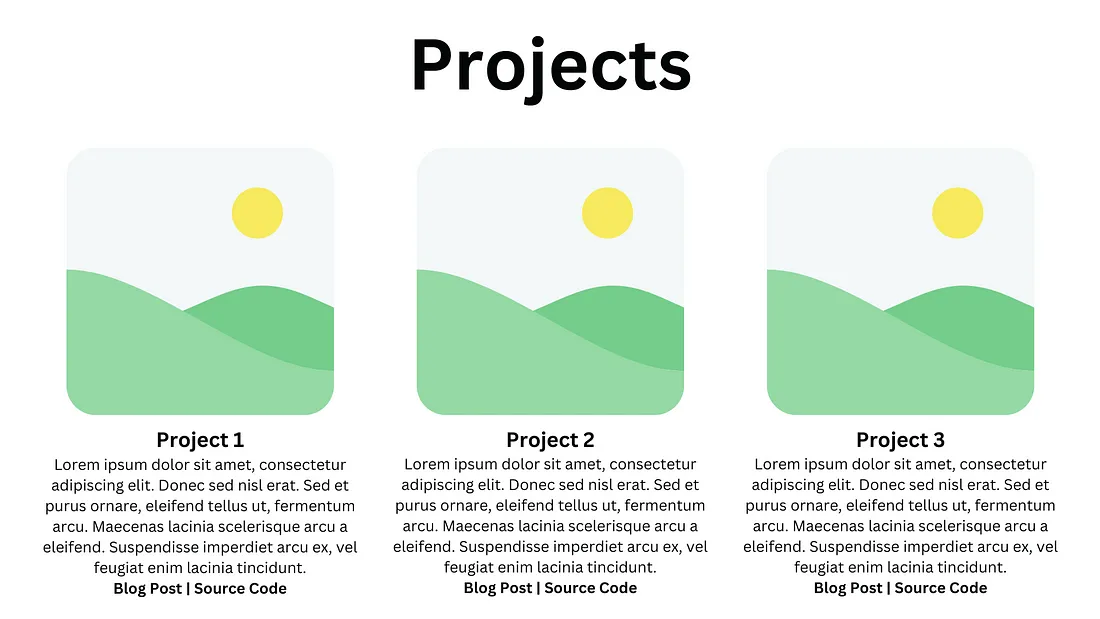
Bootstrap 有一个简单的网格系统,只需几行代码就能实现这种设计。
它还能确保网站的响应性,也就是说,在手机或平板电脑等不同类型的设备上都能显示出良好的效果。
单一文件格式
在第三个提示中,我们要求 ChatGPT 将所有代码(HTML 和 CSS)以单一文件的形式提供给我们。
这是因为我不希望在不同的代码文件之间切换时产生任何混乱,我希望保持简单。
明确的指导
最后,我告诉 ChatGPT,我们是网页设计初学者,不懂 HTML 和 CSS。
我要求它为我们提供明确的指导,告诉我们在哪里粘贴代码,以及每次该如何操作。
请务必保存你对这些自定义说明所做的更改,然后我们就可以着手实际构建网站了。
第 1 部分:关于
现在我们来创建网站的第一个部分--"关于"。
要创建该部分,请上传以下图片,并在 ChatGPT 中输入以下提示:
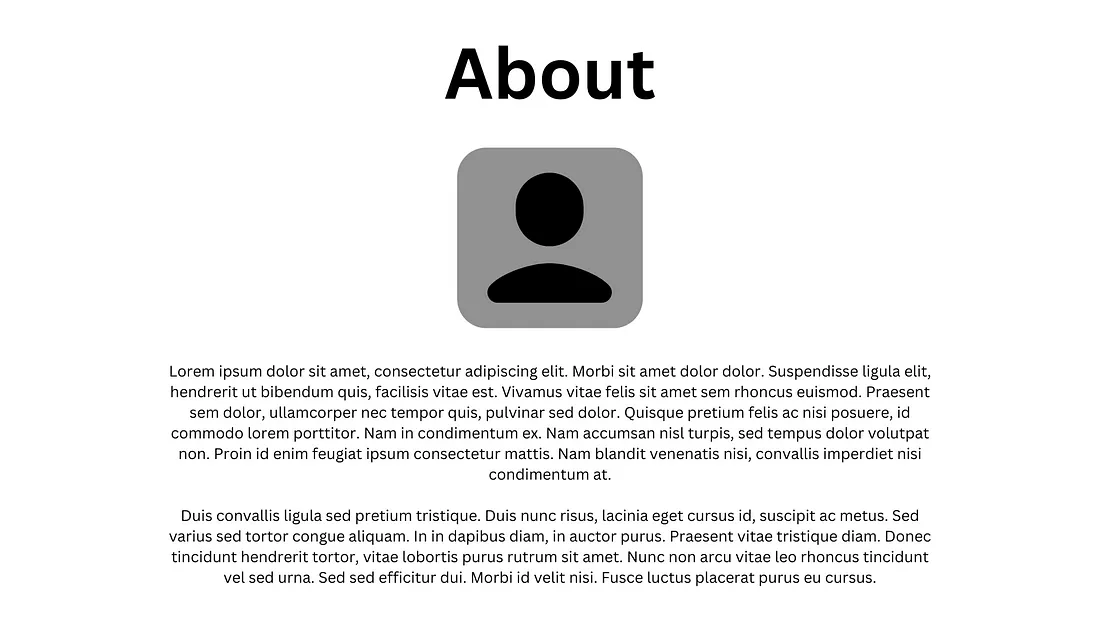
Generate code for the "About" section of my portfolio website.
Please structure the website to look like the uploaded image,
and include a placeholder for a personal picture.
Reference the picture as "images/about/1.jpg" within the code.
如果你使用的是免费版 ChatGPT 而无法使用图片上传功能,请在此链接中找到替代提示。此外,请用你自己的图片路径替换我提供的图片路径。
在我的例子中,ChatGPT 生成了以下代码行:
<!DOCTYPE html>
<html lang="en">
<head>
<meta charset="UTF-8">
<meta name="viewport" content="width=device-width, initial-scale=1.0">
<title>About Section</title>
<!-- Bootstrap CSS -->
<link rel="stylesheet" href="https://stackpath.bootstrapcdn.com/bootstrap/4.5.2/css/bootstrap.min.css">
<style>
  .about-section {
    text-align: center;
    padding: 50px 0;
  }
  .about-section h2 {
    font-size: 2.5rem;
    margin-bottom: 20px;
  }
  .about-section img {
    width: 200px; /* Adjust the size as needed */
    height: 200px;
    border-radius: 50%; /* Makes the image round */
    margin-bottom: 20px;
  }
  .about-section p {
    color: #333;
  }
</style>
</head>
<body>
<section class="about-section">
  <div class="container">
    <h2>About</h2>
    <img src="images/about/1.jpg" alt="About Me">
    <p>Lorem ipsum dolor sit amet, consectetur adipiscing elit. Morbi sit amet dolor dolor. Suspendisse ligula elit, hendrerit ut bibendum quis, facilisis vitae est. Vivamus vitae felis sit amet sem rhoncus euismod. Praesent commodo lorem porttitor. Nam in condimentum ex. Nam accumsan nisi turpis, sed tempus dolor volutpat non. Proin id enim feugiat ipsum consectetur mattis. Nam blandit venenatis nisi, convallis imperdiet nisi condimentum at.</p>
    <p>Duis convallis ligula sed pretium tristique. Duis nunc risus, lacinia eget cursus id, suscipit ac metus. Sed varius sed tortor congue aliquam. In in dapibus diam, in auctor purus. Praesent vitae tristique diam. Donec tincidunt hendrerit tortor, vitae lobortis purus rutrum sit amet. Nunc non arcu vitae leo rhoncus tincidunt vel sed urna. Sed sed efficitur dui. Morbi id velit nisi. Fusce luctus placerat purus eu cursus.</p>
  </div>
</section>
<!-- Bootstrap JS and dependencies (jQuery and Popper) -->
<script src="https://code.jquery.com/jquery-3.5.1.slim.min.js"></script>
<script src="https://cdn.jsdelivr.net/npm/popper.js@1.9.5/dist/umd/popper.min.js"></script>
<script src="https://stackpath.bootstrapcdn.com/bootstrap/4.5.2/js/bootstrap.min.js"></script>
</body>
</html>
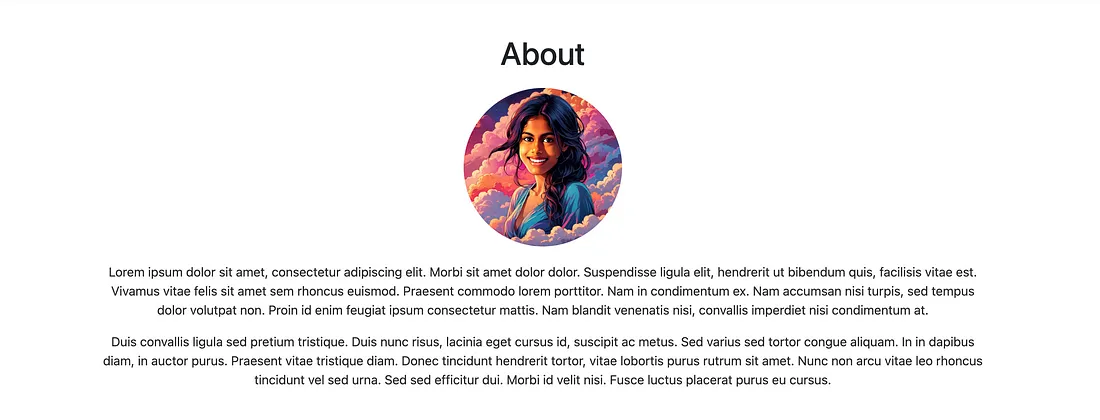
将 ChatGPT 生成的代码复制到 index.html 文件后,保存对文件的修改,然后双击该文件在浏览器中打开。你应该会看到一个 "关于 "部分,看起来像这样:
第二部分:项目
下面是我们将用来创建网站 "项目 "部分的图片和提示。请注意,我只包含三个项目--如果你想添加更多项目,请随时修改模拟图片和提示:
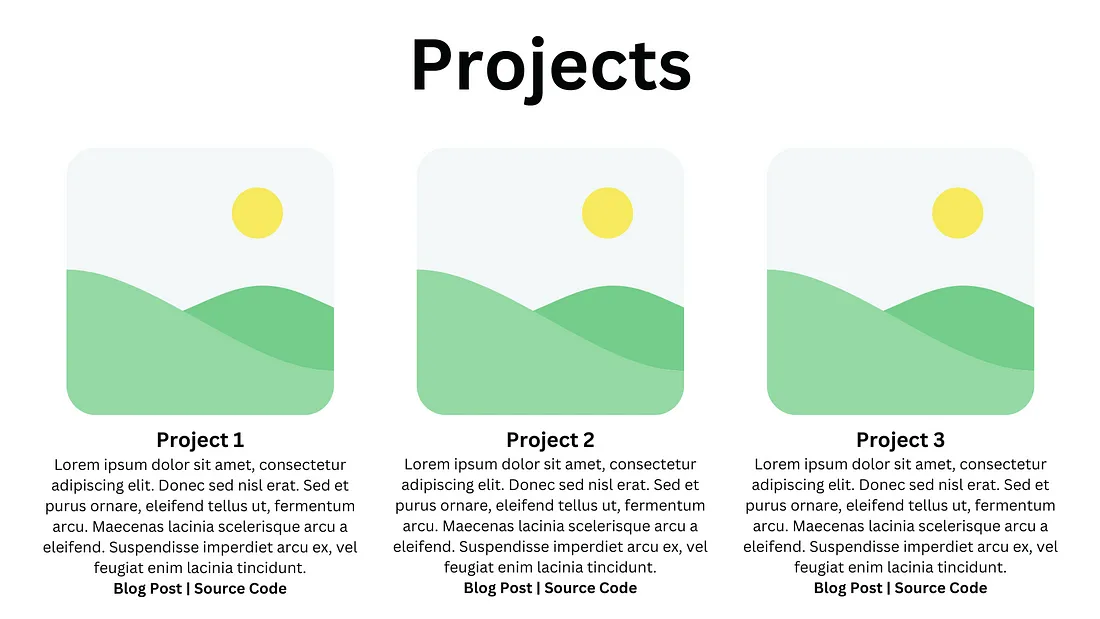
Following the "About" section, please generate code for a "Projects" section as displayed in the uploaded image. Please structure this using Bootstrap's card layout. The projects should use images named "images/projects/1.jpg," "images/projects/2.jpg," and
"images/projects/3.jpg."
输入此提示后,ChatGPT 为我生成了两个独立的代码块,一个是 HTML 代码,另一个是 CSS 代码:
HTML
<!-- Projects Section -->
<section class="projects-section bg-light" id="projects">
  <div class="container">
    <h2 class="text-center">Projects</h2>
    <div class="row">
      <!-- Project 1 -->
      <div class="col-md-4 mb-4">
        <div class="card">
          <img src="images/projects/1.jpg" class="card-img-top" alt="Project 1">
          <div class="card-body">
            <h5 class="card-title">Project 1</h5>
            <p class="card-text">Lorem ipsum dolor sit amet, consectetur adipiscing elit. Donec sed nisl erat. Sed et purus ornare, eleifend tellus ut, fermentum arcu.</p>
            <a href="#" class="btn btn-primary">Blog Post</a>
            <a href="#" class="btn btn-secondary">Source Code</a>
          </div>
        </div>
      </div>
      <!-- Project 2 -->
      <div class="col-md-4 mb-4">
        <div class="card">
          <img src="images/projects/2.jpg" class="card-img-top" alt="Project 2">
          <div class="card-body">
            <h5 class="card-title">Project 2</h5>
            <p class="card-text">Lorem ipsum dolor sit amet, consectetur adipiscing elit. Donec sed nisl erat. Sed et purus ornare, eleifend tellus ut, fermentum arcu.</p>
            <a href="#" class="btn btn-primary">Blog Post</a>
            <a href="#" class="btn btn-secondary">Source Code</a>
          </div>
        </div>
      </div>
      <!-- Project 3 -->
      <div class="col-md-4 mb-4">
        <div class="card">
          <img src="images/projects/3.jpg" class="card-img-top" alt="Project 3">
          <div class="card-body">
            <h5 class="card-title">Project 3</h5>
            <p class="card-text">Lorem ipsum dolor sit amet, consectetur adipiscing elit. Donec sed nisl erat. Sed et purus ornare, eleifend tellus ut, fermentum arcu.</p>
            <a href="#" class="btn btn-primary">Blog Post</a>
            <a href="#" class="btn btn-secondary">Source Code</a>
          </div>
        </div>
      </div>
    </div>
  </div>
</section>
CSS
/* Additional CSS for Projects Section */
.projects-section h2 {
  margin-bottom: 40px;
  font-size: 2.5rem;
}
.card {
  box-shadow: 0 0 10px rgba(0,0,0,0.1); /* Adds a subtle shadow around the card */
}
.card-img-top {
  max-height: 180px; /* Adjust this value to fit the image properly in the card */
  object-fit: cover; /* This makes sure the image covers the area properly */
}
.card-body {
  padding: 15px;
}
.card-title {
  font-size: 1.25rem;
}
.card-text {
  margin-bottom: 15px;
}
ChatGPT 还详细说明了粘贴代码的位置。ChatGPT 指出,HTML 代码应粘贴在 "关于 "部分的结尾 <section> 标记之后。CSS 应粘贴在结尾 <style> 标记之前。
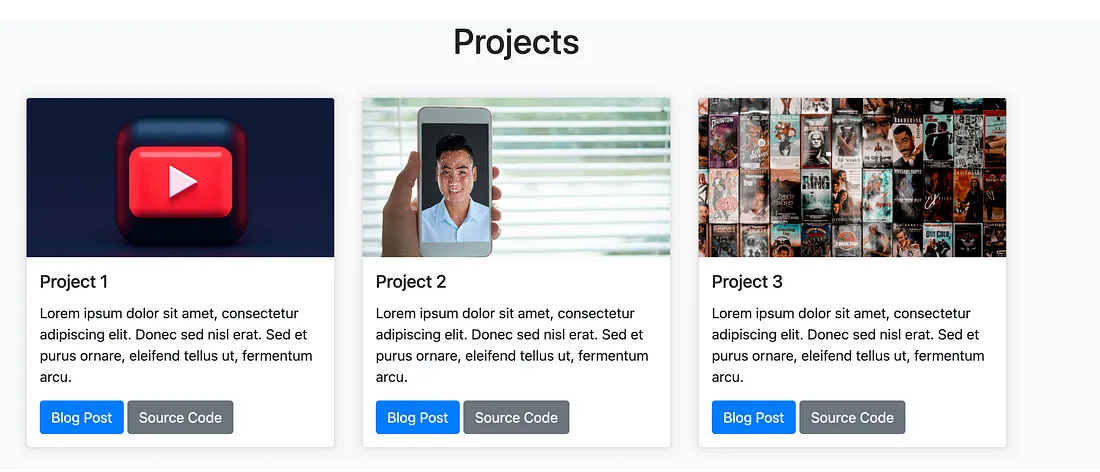
将代码粘贴到 HTML 文档后,你会看到网页上出现一个 "项目 "部分,与下图类似:
第三部分:技能
现在我们可以创建 "技能 "部分,在这里我们将强调我们的相关技术和软技能。
下面是我们将输入 ChatGPT 的模拟图片和提示:
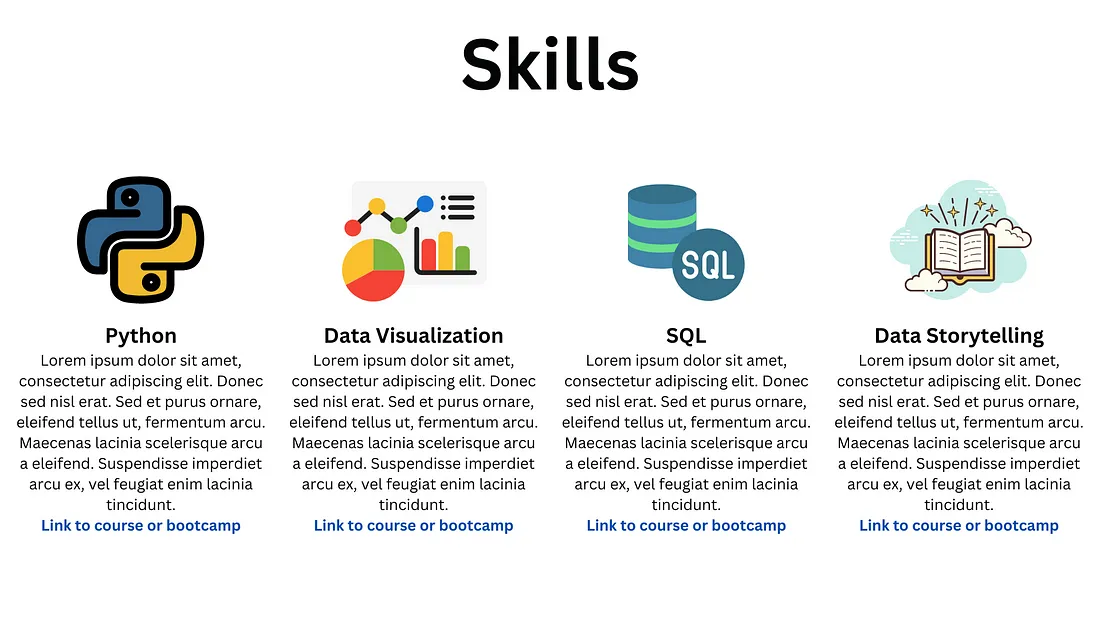
Please generate code for a “Skills” section that will follow the
“Projects” section. The layout should match the uploaded mockup image.
Use Bootstrap’s grid system to achieve this. The icons for the skills should
be referenced as “images/skills/1.png”, “images/skills/2.png”,
“images/skills/3.png”, “images/skills/4.png.”
ChatGPT 再次为我生成了两个独立的 HTML 和 CSS 代码块:
HTML
<!-- Skills Section -->
<section class="skills-section bg-white" id="skills">
  <div class="container">
    <h2 class="text-center">Skills</h2>
    <div class="row">
      <!-- Skill 1 -->
      <div class="col-lg-3 col-md-6 mb-4">
        <div class="card">
          <img src="images/skills/1.png" class="card-img-top" alt="Python">
          <div class="card-body">
            <h5 class="card-title">Python</h5>
            <p class="card-text">Lorem ipsum dolor sit amet, consectetur adipiscing elit. Donec sed nisl erat. Sed et purus ornare, eleifend tellus ut, fermentum arcu.</p>
            <a href="#" class="btn btn-outline-primary">Link to course or bootcamp</a>
          </div>
        </div>
      </div>
      <!-- Skill 2 -->
      <div class="col-lg-3 col-md-6 mb-4">
        <div class="card">
          <img src="images/skills/2.png" class="card-img-top" alt="Data Visualization">
          <div class="card-body">
            <h5 class="card-title">Data Visualization</h5>
            <p class="card-text">Lorem ipsum dolor sit amet, consectetur adipiscing elit. Donec sed nisl erat. Sed et purus ornare, eleifend tellus ut, fermentum arcu.</p>
            <a href="#" class="btn btn-outline-primary">Link to course or bootcamp</a>
          </div>
        </div>
      </div>
      <!-- Skill 3 -->
      <div class="col-lg-3 col-md-6 mb-4">
        <div class="card">
          <img src="images/skills/3.png" class="card-img-top" alt="SQL">
          <div class="card-body">
            <h5 class="card-title">SQL</h5>
            <p class="card-text">Lorem ipsum dolor sit amet, consectetur adipiscing elit. Donec sed nisl erat. Sed et purus ornare, eleifend tellus ut, fermentum arcu.</p>
            <a href="#" class="btn btn-outline-primary">Link to course or bootcamp</a>
          </div>
        </div>
      </div>
      <!-- Skill 4 -->
      <div class="col-lg-3 col-md-6 mb-4">
        <div class="card">
          <img src="images/skills/4.png" class="card-img-top" alt="Data Storytelling">
          <div class="card-body">
            <h5 class="card-title">Data Storytelling</h5>
            <p class="card-text">Lorem ipsum dolor sit amet, consectetur adipiscing elit. Donec sed nisl erat. Sed et purus ornare, eleifend tellus ut, fermentum arcu.</p>
            <a href="#" class="btn btn-outline-primary">Link to course or bootcamp</a>
          </div>
        </div>
      </div>
    </div>
  </div>
</section>
CSS
/* Additional CSS for Skills Section */
.skills-section h2 {
  margin-bottom: 40px;
  font-size: 2.5rem;
}
.skills-section .card {
  box-shadow: 0 4px 6px rgba(0,0,0,0.1);
}
.skills-section .card-img-top {
  padding: 20px; /* Add padding around your images if needed */
  background-color: #f8f9fa; /* Adjust the background color if your images have transparent areas */
  height: 180px; /* Fixed height for consistency */
  object-fit: contain; /* This will make sure the image is scaled properly within the container */
}
.skills-section .card-body {
  padding: 15px;
}
.skills-section .card-title {
  font-size: 1.25rem;
  margin-bottom: 15px;
}
.skills-section .btn-outline-primary {
  color: #007bff;
  border-color: #007bff;
}
.skills-section .btn-outline-primary:hover {
  color: #fff;
  background-color: #007bff;
  border-color: #007bff;
}
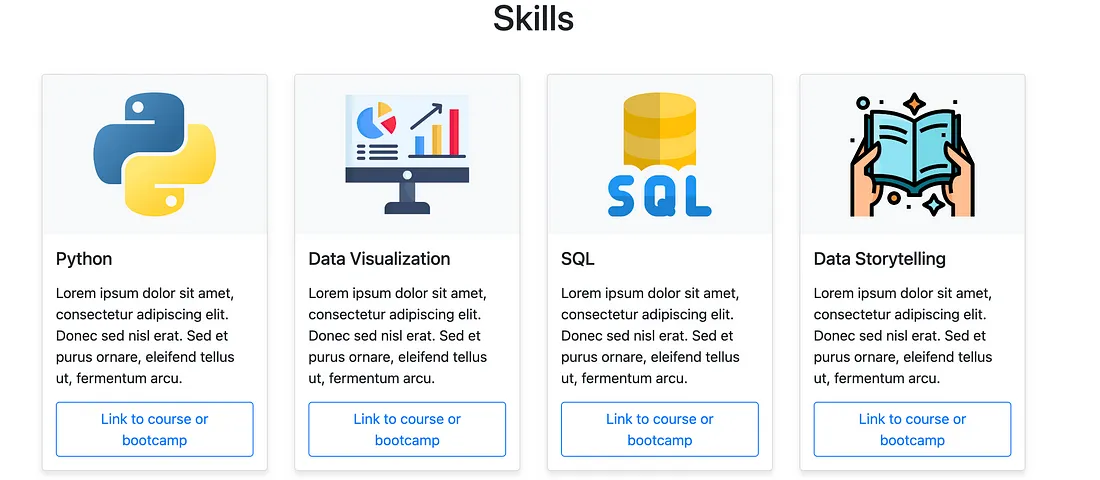
粘贴上述代码并刷新 HTML 网页后,你应该会看到一个 "技能 "部分,看起来像这样:
第 4 部分:联系
现在,让我们为网站创建一个 "联系我 "部分。
在这里,我们将添加电话号码和电子邮件地址等联系信息。
我们还可以添加 LinkedIn 和 GitHub 等平台的链接。
下面是使用 ChatGPT 创建该部分的模拟图片和提示:
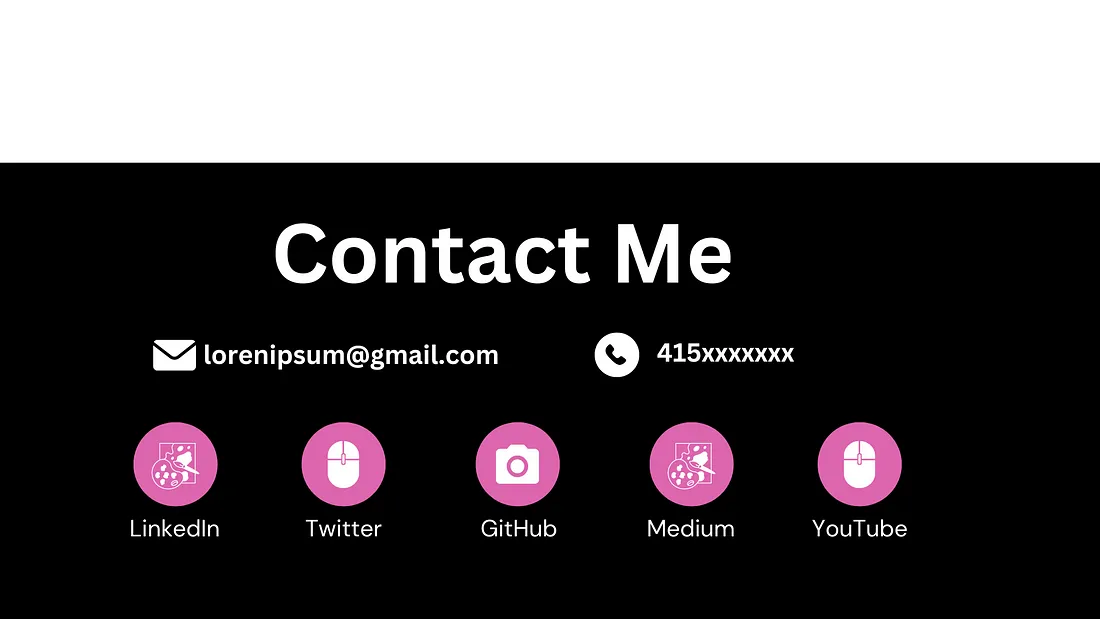
Please generate code for a “Contact Me” section to be placed following
the “Skills” section on my portfolio website. It should visually match the
uploaded mockup image. Ensure that the icons for the platforms are referenced
as “icons/linkedin.png”, “icons/twitter.png”, “icons/github.png”,
“icons/medium.png”, “icons/youtube.png.”
下面是我输入上述图片和提示后 ChatGPT 生成的代码:
HTML
<!-- Contact Me Section -->
<section class="contact-section text-center text-white bg-dark">
<div class="container">
<h2>Contact Me</h2>
<div class="row">
<div class="col-lg-6">
<p><i class="fas fa-envelope"></i> loremipsum@gmail.com</p>
</div>
<div class="col-lg-6">
<p><i class="fas fa-phone"></i> 415xxxxxxx</p>
</div>
</div>
<div class="row">
<div class="col-lg-2 col-md-4 mb-4">
<a href="https://linkedin.com/in/yourusername" target="_blank">
<img src="icons/linkedin.png" alt="LinkedIn" class="social-icon">
</a>
</div>
<div class="col-lg-2 col-md-4 mb-4">
<a href="https://twitter.com/yourusername" target="_blank">
<img src="icons/twitter.png" alt="Twitter" class="social-icon">
</a>
</div>
<div class="col-lg-2 col-md-4 mb-4">
<a href="https://github.com/yourusername" target="_blank">
<img src="icons/github.png" alt="GitHub" class="social-icon">
GitHub
</a>
</div>
<div class="col-lg-2 col-md-4 mb-4">
<a href="https://medium.com/@yourusername" target="_blank">
<img src="icons/medium.png" alt="Medium" class="social-icon">
Medium
</a>
</div>
<div class="col-lg-2 col-md-4 mb-4">
<a href="https://youtube.com/c/yourchannel" target="_blank">
<img src="icons/youtube.png" alt="YouTube" class="social-icon">
YouTube
</a>
</div>
</div>
</div>
</section>
CSS
/* Additional CSS for Contact Section */
.contact-section {
  padding: 50px 0;
}
.contact-section h2 {
  font-size: 2.5rem;
  margin-bottom: 40px;
}
.contact-section p {
  font-size: 1.2rem;
  margin-bottom: 20px;
}
.social-icon {
  width: 50px; /* Size of your icons */
  margin-bottom: 10px;
}
/* Hover effect for icons */
.social-icon:hover {
  opacity: 0.7;
}
/* Style for links in the Contact section */
.contact-section a {
  color: #fff;
  text-decoration: none; /* Removes underline from links */
  display: inline-block; /* Allows for margin on the bottom */
  margin-bottom: 10px;
}
.contact-section a:hover {
  color: #ddd; /* Color when hovering over the link */
}
将上述代码粘贴到 HTML 文档中并刷新网页后,你应该会看到一个 "联系我 "部分,看起来像这样:

请记住,这里显示的链接将不起作用,因为你需要将它们重定向到你的相关社交媒体手柄。
要做到这一点,请导航到 index.html 文件中的 "联系我 "部分,然后用 href 属性(如下图)替换每一行中的 URL:
<a href="https://youtube.com/c/yourchannel" target="_blank">第 5 部分:导航栏
最后,我们将为这个作品集网站创建一个导航栏。
导航栏通常位于网站的顶部,点击导航栏可以跳转到网站的不同位置。
在 ChatGPT 中输入此提示以创建导航栏(本部分不上传模拟图片):
Please provide HTML and CSS code for a sticky navigation bar to be placed at the top of my portfolio website.
It should remain at the top of the page as the user scrolls down, and must include the following links:
Home (which will take the user back to the top of the page)
About (which scrolls to the About section)
Projects (which scrolls to the Projects section)
Skills (which scrolls to the Skills section)
Contact (which scrolls to the Contact section)
下面是 ChatGPT 根据提示生成的代码:
HTML
<!-- Sticky Navigation Bar -->
<nav class="navbar navbar-expand-lg navbar-dark bg-dark fixed-top">
  <div class="container">
    <a class="navbar-brand" href="#home">Portfolio</a>
    <button class="navbar-toggler" type="button" data-toggle="collapse" data-target="#navbarNav" aria-controls="navbarNav" aria-expanded="false" aria-label="Toggle navigation">
      <span class="navbar-toggler-icon"></span>
    </button>
    <div class="collapse navbar-collapse" id="navbarNav">
      <ul class="navbar-nav ml-auto">
        <li class="nav-item">
          <a class="nav-link" href="#home">Home</a>
        </li>
        <li class="nav-item">
          <a class="nav-link" href="#about">About</a>
        </li>
        <li class="nav-item">
          <a class="nav-link" href="#projects">Projects</a>
        </li>
        <li class="nav-item">
          <a class="nav-link" href="#skills">Skills</a>
        </li>
        <li class="nav-item">
          <a class="nav-link" href="#contact">Contact</a>
        </li>
      </ul>
    </div>
  </div>
</nav>
CSS
/* CSS for Sticky Navbar */
.navbar {
  box-shadow: 0 2px 5px rgba(0,0,0,0.2); /* Adds a shadow for depth */
}
/* Ensure padding is added to body to avoid content being hidden behind the navbar */
body {
  padding-top: 56px; /* Adjust this value based on the height of your navbar */
}
/* Smooth scroll */
html {
  scroll-behavior: smooth;
}
/* Style for navigation bar links */
.navbar-nav .nav-link {
  color: white;
}
.navbar-nav .nav-link:hover {
  color: #f8f9fa; /* Slightly lighter white when hovering over links */
}
/* Media query for responsive navbar collapsing */
@media (max-width: 992px) {
  .navbar-collapse {
    background-color: #343a40; /* Same as navbar color for seamless look */
  }
}
为确保导航栏上的链接正常运行,你必须在网站的每个部分加入一个与导航链接相匹配的 ID。
例如,在 HTML 文档中导航到 "关于 "部分,然后输入 "id=about",如下所示:
<section id="about" class="about-section">
  <!-- Content of About Section -->
</section>
对其他部分也做同样的操作。
保存对文档所做的更改后,你应该会看到网页顶部出现类似这样的导航栏:

单击此导航栏上的每个部分应将你定向到网站上的相应部分。


