构建本地LLM聊天应用程序:Ollama分步指南
简介
大型语言模型 (LLM) 彻底改变了人工智能领域,提供了令人印象深刻的语言理解和生成能力。
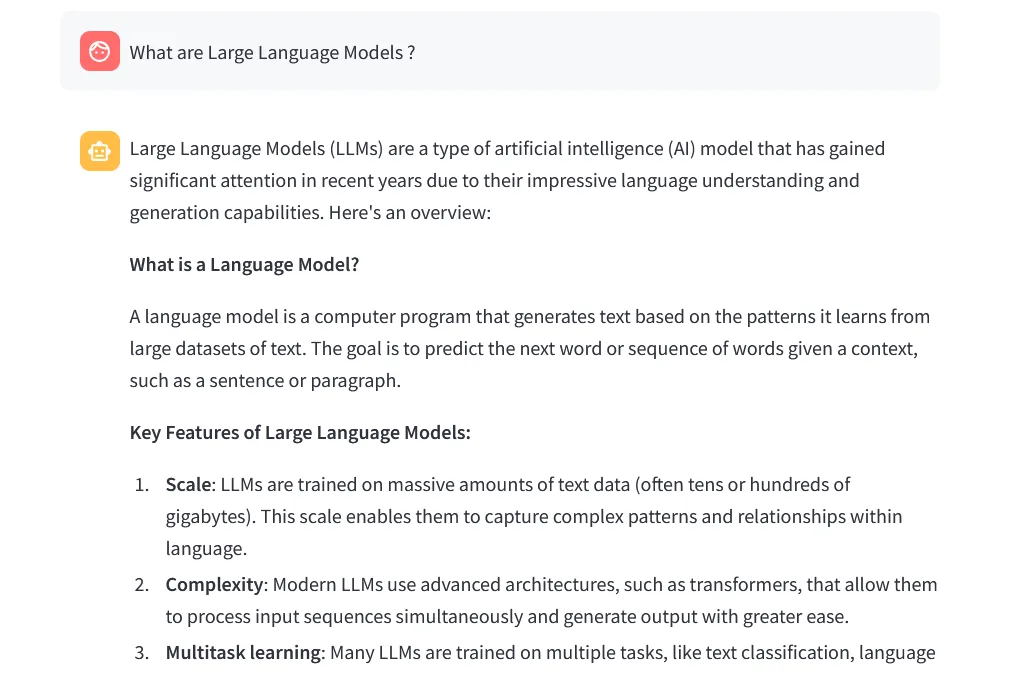
本文将指导你构建一个使用本地 LLM(特别是通过 Ollama 库集成的 Meta 的 Llama 3.1 8b 模型)的 Streamlit 聊天应用程序。
先决条件
在深入研究代码之前,请确保已安装以下内容:
- Python
- Streamlit
- Ollama
设置 Ollama 并下载 Llama 3.1 8b
首先,你需要安装 Ollama 并下载 Llama 3.1 8b 模型。打开命令行界面并执行以下命令:
# Install Ollama
pip install ollama
# Download Llama 3.1 8b model
ollama run llama3.1:8b
创建模型文件
要创建与 Streamlit 应用程序无缝集成的自定义模型,请按照以下步骤操作:
- 在你的项目目录中,创建一个不带任何扩展名的名为 Modelfile 的文件。
- 在文本编辑器中打开 Modelfile,添加以下内容:
model: llama3.1:8b该文件指示 Ollama 使用 Llama 3.1 8b 模型。
代码
导入库和设置日志
import streamlit as st
from llama_index.core.llms import ChatMessage
import logging
import time
from llama_index.llms.ollama import Ollama
logging.basicConfig(level=logging.INFO)- streamlit as st: 这将导入用于创建交互式网络应用程序的 Streamlit 库。
- ChatMessage 和 Ollama:从 llama_index 库导入,用于处理聊天信息并与 Llama 模型交互。
- logging: 用于记录信息、警告和错误,有助于调试和跟踪应用程序的行为。
- time:时间库: 该库用于测量生成回复所需的时间。
初始化聊天记录
if 'messages' not in st.session_state:
st.session_state.messages = []- st.session_state: 这是 Streamlit 的一项功能,可以在应用程序的不同运行过程中存储变量。在这里,它被用来存储聊天记录。
- if 语句会检查 session_state 中是否已经有 "messages"。如果没有,则将其初始化为空列表。
流式传输聊天响应的函数
def stream_chat(model, messages):
    try:
        llm = Ollama(model=model, request_timeout=120.0)
        resp = llm.stream_chat(messages)
        response = ""
        response_placeholder = st.empty()
        for r in resp:
            response += r.delta
            response_placeholder.write(response)
        logging.info(f"Model: {model}, Messages: {messages}, Response: {response}")
        return response
    except Exception as e:
        logging.error(f"Error during streaming: {str(e)}")
raise e- stream_chat(聊天流): 该函数处理与 Llama 模型的交互。
- Ollama(model=模型, request_timeout=120.0): 使用指定超时初始化 Llama 模型。
- llm.stream_chat(messages): 从模型流式传输聊天响应。
- response_placeholder = st.empty(): 在 Streamlit 应用程序中创建一个占位符,以便动态更新响应。
- for 循环会将响应的每个部分追加到最终的响应字符串中,并更新占位符。
- logging.info 记录模型、信息和响应。
- except 块会捕捉并记录流式处理过程中出现的任何错误。
主要功能
def main():
    st.title("Chat with LLMs Models")
    logging.info("App started")
    model = st.sidebar.selectbox("Choose a model", ["mymodel", "llama3.1 8b", "phi3", "mistral"])
    logging.info(f"Model selected: {model}")
    if prompt := st.chat_input("Your question"):
        st.session_state.messages.append({"role": "user", "content": prompt})
        logging.info(f"User input: {prompt}")
        for message in st.session_state.messages:
            with st.chat_message(message["role"]):
                st.write(message["content"])
        if st.session_state.messages[-1]["role"] != "assistant":
            with st.chat_message("assistant"):
                start_time = time.time()
                logging.info("Generating response")
                with st.spinner("Writing..."):
                    try:
                        messages = [ChatMessage(role=msg["role"], content=msg["content"]) for msg in st.session_state.messages]
                        response_message = stream_chat(model, messages)
                        duration = time.time() - start_time
                        response_message_with_duration = f"{response_message}\n\nDuration: {duration:.2f} seconds"
                        st.session_state.messages.append({"role": "assistant", "content": response_message_with_duration})
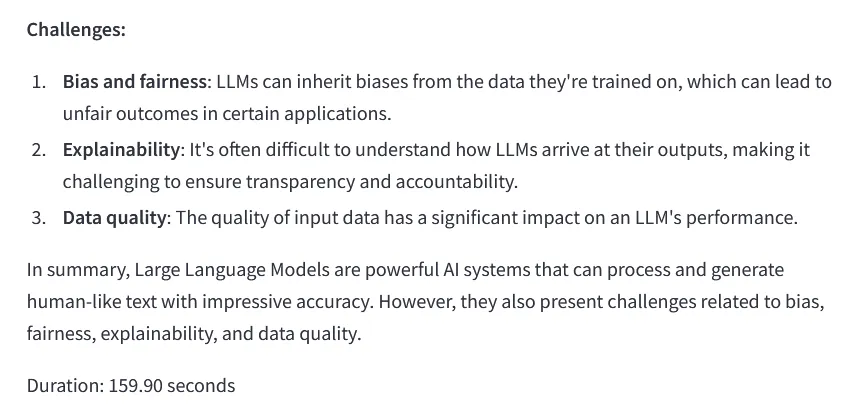
                        st.write(f"Duration: {duration:.2f} seconds")
                        logging.info(f"Response: {response_message}, Duration: {duration:.2f} s")
                    except Exception as e:
                        st.session_state.messages.append({"role": "assistant", "content": str(e)})
                        st.error("An error occurred while generating the response.")
                        logging.error(f"Error: {str(e)}")
if __name__ == "__main__":
main()- main(主函数): 这是设置和运行 Streamlit 应用程序的主函数。
- st.title("与 LLMs 模型聊天"): 设置应用程序的标题。
- model = st.sidebar.selectbox("选择模型", ["mymodel", "llama3.1 8b", "phi3", "mistral"]): 在侧边栏创建一个下拉菜单,用于选择模型。
- if prompt := st.chat_input("你的问题"): 接收用户输入并将其添加到聊天记录中。
- for 循环显示聊天记录中的每条信息。
- if 语句会检查最后一条信息是否不是来自助手。如果为 "true",就会从模型中生成回复。
- with st.spinner("Writing..."): 在生成回复时显示一个旋转器。
- messages = [ChatMessage(role=msg["role"], content=msg["content"]) for msg in st.session_state.messages]: 为 Llama 模型准备消息。
- response_message = stream_chat(model, messages): 调用 stream_chat 函数获取模型的响应。
- duration = time.time() - start_time: 计算生成响应所需的时间。
- response_message_with_duration = f"{response_message}\n\nDuration: {duration:.2f} seconds": 将持续时间附加到响应消息中。
- st.session_state.messages.append({"role": "assistant", "content": response_message_with_duration}): 将助手的回复添加到聊天记录中。
- st.write(f "Duration: {duration:.2f} seconds"): 显示生成回复的持续时间。
- except 块会处理生成回复过程中出现的错误,并显示错误信息。
运行 Streamlit 应用程序
要运行 Streamlit 应用程序,请在项目目录下执行以下命令:
streamlit run app.py确保你的 Ollama 实例在后台运行,以获取任何活动或结果。


使用 Ollama 训练模型
使用 Ollama 在不同数据集上训练模型的步骤相同。下面介绍如何使用 Ollama 管理和训练模型。

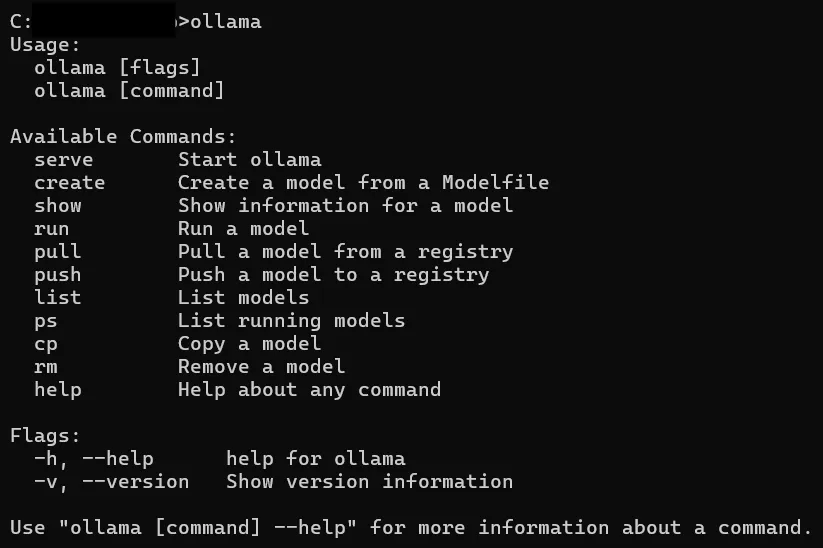
Ollama 命令
要使用 Ollama 进行模型管理和培训,你需要熟悉以下命令:

范例: 创建和使用模型
1. 创建模型文件: 在项目目录中创建一个 Modelfile,其中包含自定义模型的说明。
2. Modelfile 的内容:
# Example content for creating a custom model
name: custom_model
base_model: llama3.1
data_path: /path/to/your/dataset
epochs: 10
3. 创建模型: 使用创建命令从 Modelfile 创建模型。
ollama create -f Modelfile4.运行模型: 创建模型后,你可以使用以下功能运行模型:
ollama run custom_model与 Streamlit 或其他程序整合:你可以将此自定义模型与你的 Streamlit 应用程序整合,就像你整合预训练模型一样。
按照这些步骤,你可以创建一个 Streamlit 应用程序,使用 Ollama 库与本地 LLM 进行交互。
C:\your\path\location>ollama
Usage:
 ollama [flags]
 ollama [command]
Available Commands:
 serve Start ollama
 create Create a model from a Modelfile
 show Show information for a model
 run Run a model
 pull Pull a model from a registry
 push Push a model to a registry
 list List models
 ps List running models
 cp Copy a model
 rm Remove a model
 help Help about any command
Flags:
 -h, - help help for ollama
 -v, - version Show version information
Use "ollama [command] - help" for more information about a command.
此外,你还可以使用相同的步骤和 Ollama 命令来训练和管理不同数据集上的模型。这种灵活性使你可以在 Streamlit 应用程序中利用自定义训练的模型,提供更量身定制的交互式用户体验。
使用 Flask 实现
这种方法也可用于使用 Flask 实现聊天应用程序。以下是将 Ollama 与 Flask 应用程序集成的大纲:
Flask 应用程序设置
1. 安装 Flask:
pip install Flask2. 创建 Flask 应用程序:
from flask import Flask, request, jsonify
from llama_index.core.llms import ChatMessage
from llama_index.llms.ollama import Ollama
import logging
app = Flask(__name__)
logging.basicConfig(level=logging.INFO)
@app.route('/chat', methods=['POST'])
def chat():
    data = request.json
    messages = data.get('messages', [])
    model = data.get('model', 'llama3.1 8b')

    try:
        llm = Ollama(model=model, request_timeout=120.0)
        resp = llm.stream_chat(messages)
        response = ""
        for r in resp:
            response += r.delta
        logging.info(f"Model: {model}, Messages: {messages}, Response: {response}")
        return jsonify({'response': response})
    except Exception as e:
        logging.error(f"Error during streaming: {str(e)}")
        return jsonify({'error': str(e)}), 500
if __name__ == '__main__':
    app.run(debug=True)
运行 Flask 应用程序
将代码保存到一个文件(如 app.py)中,然后运行以下命令:
python app.py这将启动 Flask 应用程序,你可以使用包含消息和模型的 JSON 数据向 /chat 端点发出 POST 请求,从 Llama 模型获取响应。
将 Flask 与 Ollama 整合
按照与 Streamlit 类似的步骤,你可以将 Ollama 与 Flask 应用程序集成。stream_chat 函数可以重复使用,Flask 路由可以处理与模型的交互,从而轻松创建可扩展的聊天应用程序。
总结
通过本文,你已经使用本地 LLM 成功创建了一个 Streamlit 聊天应用程序。通过这种设置,你可以直接从本地机器与功能强大的语言模型进行交互,获得直观的交互体验。无论你是提出一般性问题,还是深入探讨具体问题,你的应用程序现在都能应对自如。


